Ever fumbled for that clunky remote in the dark, wondering if the bed will even move? You’re not alone – countless Australians with chronic pain, NDIS support needs, or senior mobility concerns have stared at a blinking button and thought, “There’s got to be a better way.”
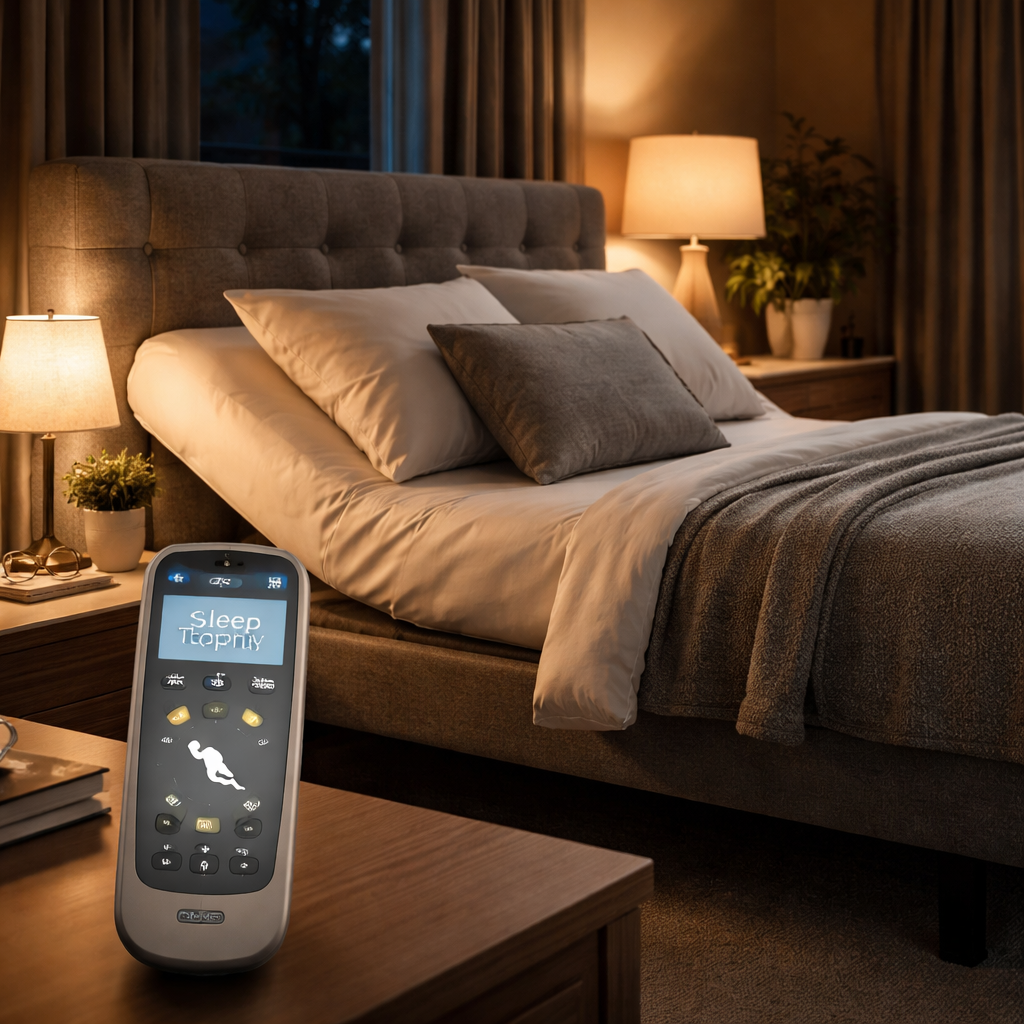
That frustration is exactly why the electric adjustable bed remote has become a game‑changer in Australia. Instead of wrestling with a bulky controller, you get a sleek, battery‑powered handset that talks straight to the motorised base. One press can lift your head, lower your feet, or fine‑tune the lumbar support in five‑degree increments – all without leaving the comfort of your mattress.
What we’ve seen work best at Sleep Sophie is pairing the remote with a simple reset routine. If the bed feels sluggish or the remote isn’t responding, a quick power‑cycle often restores full functionality. For a step‑by‑step walkthrough, check out our How to Reset Adjustable Bed Remote: A Simple Step‑by‑Step Guide. It walks you through unplugging the base, waiting a minute, and re‑pairing the remote – no tech‑support ticket required.
Let’s talk real‑world scenarios. Imagine Maya, a NDIS participant, who needs to shift into a “Therapy” position three times a night to ease back pain. With the remote, she can save that preset and tap a single button – no complex menu navigation. Or think of Jim, an 82‑year‑old caring for himself, who struggles to reach a remote perched on a nightstand. The lightweight remote fits comfortably in his palm, and the large, tactile buttons let him adjust the bed without straining his fingers.
Here are three quick tips to get the most out of your electric adjustable bed remote:
- Check the battery early. Most remotes use a CR2032 coin cell – replace it once the LED starts flashing amber.
- Keep the remote within a foot of the base during the first pairing. Signal strength drops quickly, so a short distance ensures a clean Bluetooth handshake.
- Create and label presets. Whether it’s “Reading,” “TV,” or “Leg‑Up,” naming each position saves time and eliminates guesswork.
And remember, safety is built in. All reputable Australian models include a “stop” button that cuts power instantly if the movement feels off, plus a lock‑out feature when the side rail is engaged – essential for seniors getting in and out of bed.
So, if you’ve been wrestling with a stubborn remote or thinking about upgrading, start by resetting it, testing the battery, and programming those life‑saving presets. You’ll soon wonder how you ever slept without this little piece of control in your hand.
TL;DR
Struggling with a clunky controller? Our quick guide shows how the electric adjustable bed remote australia lets seniors, NDIS participants, and chronic‑pain sufferers effortlessly fine‑tune head, foot and lumbar angles with a simple press.
Replace the battery early, pair within a foot, and create labelled presets for hassle‑free comfort everyday.
Step 1: Identify Your Bed Model and Remote Compatibility
First thing’s first – you need to know exactly which adjustable bed you’ve got sitting in your bedroom. It sounds simple, but the truth is most of us just see the sleek frame and assume any remote will work. In reality, each brand – whether it’s a Sleep Sophie Sophie SmartLift or a third‑party model – talks a slightly different language over Bluetooth or RF.
Take a moment to locate the model badge on the side rail or underneath the headboard. It usually lists a series name (like “Sophie Pro” or “ErgoFlex”) and a short code. Jot that down; you’ll need it when you search the user manual or when you call support. If you can’t find a badge, check the paperwork that came with the bed or the original purchase email – the model number is always in there.
Once you have the model, the next step is to verify the remote’s compatibility. Some beds ship with a dedicated remote, while others rely on a universal controller that can pair with multiple bases. Look for a label on the remote itself – it might read “Compatible with Sleep Sophie models” or list a range of model numbers. If the remote is brand‑agnostic, you’ll usually find a QR code or a short URL printed on the back; scanning it will pull up a compatibility chart.
Now, here’s a little tip that saves a lot of headaches: before you even think about pairing, make sure the remote’s battery is fresh. Most Australian electric adjustable bed remotes use a CR2032 coin cell. When the LED starts flashing amber, it’s a sign the battery is low and the signal can become flaky. Swapping the battery now prevents a half‑done pairing later.
So, what should you do next? Grab the remote, open the battery compartment, and replace the coin cell if you see any warning light. Then, power up the bed – you’ll usually hear a soft click or see a green LED on the base. If the base doesn’t light up, double‑check that it’s plugged into a dedicated 240 V outlet and not a power strip.
With the bed awake and the remote fully charged, it’s time to bring them together. Most modern beds use Bluetooth Low Energy (BLE) for pairing, which means you need to be within a foot or two of the base during the initial handshake. Place the remote on the nightstand right next to the headboard, press the pairing button (often a small recessed button you’ll need a paperclip for), and watch for a steady green light on the remote. That steady light tells you the connection is solid.
And if you’re wondering whether the remote you have is the right one for a specific model, the answer usually lies in the user manual’s “Remote Compatibility” table. If you can’t locate the manual, a quick search of the model number plus the phrase “remote compatibility” will pull up a PDF from the manufacturer’s site. That’s where you’ll see if you need a proprietary remote or if a universal one will do the trick.
Need a visual walk‑through? Check out the short video below – it shows the exact hand‑on steps for pairing a remote with a typical Australian bed base.
After the video, give yourself a quick sanity check: does the remote’s LED stay solid when you press a button? Does the head or foot section move as expected? If the answer is “yes,” you’re good to go. If not, you may need to repeat the pairing process, making sure there’s no metal object or Wi‑Fi router right between the remote and the base – those can interfere with the Bluetooth signal.
One more thing to keep in mind is that some higher‑end beds, like those with integrated smartphone apps, also let you pair a secondary remote as a backup. That can be a lifesaver for caregivers who need a spare controller on a nightstand across the room.
Finally, write down the pairing code (if one was shown) and store it somewhere safe – it’s your fallback if you ever need to reset the system. A quick note in a bedside notebook or a photo on your phone does the trick.
With the model identified and the remote confidently paired, you’ve cleared the biggest hurdle before you can start fine‑tuning angles, setting presets, and enjoying the comfort that an electric adjustable bed remote Australia promises.

Step 2: Pairing the Remote with Your Bed
Let’s keep this simple. You’ve got the electric adjustable bed remote in hand and the bed sitting there waiting to listen. Here’s how to pair them so you get quick, reliable control every night.
First, make sure you’re matching the right remote to the right base. In our experience, the exact base model matters for how smoothly pairing works, and a mismatched remote will waste your time. If labels are worn, your manual or receipts from Sleep Sophie can confirm the correct pairing. Don’t guess here—it saves real headaches later.
Next up, prep the remote and base so you’re not chasing problems mid-task. Check the battery in the remote. Most Aussie remotes run on a CR2032 coin cell. If you press a button and the LED flickers amber or dies mid‑action, swap it now. Keep the remote within a foot of the base during pairing; a short distance makes the handshake clean and fast.
Now let’s talk about a clean slate. Do a quick power cycle: unplug the base from the wall, wait a full minute, then plug it back in and give the base time to boot up fully. When the lights settle, you know you’re starting from a solid foundation. This tiny reset clears glitches that can block pairing and speed things up dramatically on a first try.
Here’s where the actual pairing happens. Most systems use a straightforward handshake. You’ll either press and hold a pairing button on the base, or select a pairing option on the remote. If you see a slow blink on the remote LED or a confirmation on the base, you’re in. If nothing happens, try moving the two even closer and attempting again. Some models prompt you to confirm a PIN or code—follow the prompts calmly. It’s the one step that separates a smooth setup from a frustrating chase around the room.
Does this really work? It does when you test right away. After pairing, run a quick motion check. Raise the head slightly, lower the feet, and adjust lumbar support in five‑degree increments. If any motion feels sticky, stop, check the battery again, and retry the pairing. Small delays or lag aren’t the end of the world, but they’re signals to re‑check connections and proximity.
Now that the basics are done, it’s time to organize your life with presets. Five to seven labelled positions—like Reading, TV, Therapy, or Bedtime—save you from fumbling in the dark. Save each position once you’re happy with the angle, then test them during the night to ensure they hold as you move around the room. For caregivers, clear presets can make transfers safer and simpler, reducing the risk of mid‑motion surprises.
One practical tip: if you’re pairing in a busy household, minimize interference by keeping other wireless devices a little away from the bed during setup. Sometimes a router or cordless phone can introduce stray signals that confuse the initial handshake. If you run into trouble, do a quick re‑boot of the base and the remote and try again from a closer distance—usually that’s enough to restore a clean link.
So, what should you do next? Gather the base, your remote, and fresh batteries. Do a quick power cycle, initiate pairing, then test, name your presets, and lock in a few favorites. With those steps, you’ll have reliable control at your fingertips and fewer wake‑up frenzies in the middle of the night.
Step 3: Troubleshooting Common Connectivity Issues
Ever pressed a button on your electric adjustable bed remote and heard nothing but a faint click? You’re not alone – a weak signal, a tired battery, or a stray Wi‑Fi wave can turn a smooth night into a guessing game.
Let’s walk through the most common connectivity hiccups, why they happen, and what you can do without calling a tech‑support line.
1. Check the battery before you blame the base
Most Aussie remotes run on a CR2032 coin cell. When the LED starts flashing amber, that’s the battery waving a tiny white flag. Swap it for a fresh one and watch the response speed jump back to normal.
Quick tip: keep a spare battery in your bedside drawer – it only takes a minute to replace and saves you from a midnight scramble.
2. Proximity matters – stay within a foot during the first pairing
Bluetooth and low‑power radio love short distances. If you’re trying to pair from across the room, the handshake can get lost in the ether.
Bring the remote right up to the base, press the pairing button, and wait for the steady blink. Once the link is solid, you can move the remote farther away – the connection will hold.
3. Interference from other wireless devices
Routers, cordless phones, even a nearby baby monitor can throw static onto the signal. In a busy household, it’s not unusual for a Wi‑Fi channel to clash with the remote’s 2.4 GHz band.
Try turning off or moving other devices a metre away while you’re pairing. If you’re in a rental with a shared router, a quick router reboot can clear up lingering interference.
4. Power‑cycle the base and remote
Sometimes the controller’s firmware gets a little fuzzy. Unplug the base, wait 60 seconds, plug it back in, and let the lights settle. Do the same with the remote – hold the power button for three seconds to reset it.
After both have rebooted, repeat the pairing steps. You’ll often see a smoother connection the second time around.
5. Verify the remote’s mode
Some remotes have a “sleep” or “standby” mode to conserve battery. If the LED is dim or pulsing, you might just need to press the wake‑up button (usually the same as the power button) to bring it back to full‑power mode.
Don’t overlook the manual – it usually lists the exact sequence for exiting standby.
6. Use the official troubleshooting guide
Sleep Australasia provides a concise PDF that walks you through error codes and LED patterns. It’s a handy reference when the remote throws a mystery blink.
You can download it here and match the pattern to a simple fix.
Quick checklist before you call a technician
- Battery fresh? (CR2032)
- Remote within a foot of the base during pairing?
- All nearby wireless devices turned off or moved away?
- Base and remote power‑cycled?
- Remote out of standby mode?
- LED pattern cross‑checked with the troubleshooting manual?
If you tick every box and still can’t get a response, it’s likely a hardware fault and the warranty can cover a replacement.
| Issue | Typical Symptom | Simple Fix |
|---|---|---|
| Low battery | LED flashes amber, sluggish response | Replace CR2032 coin cell |
| Signal interference | No response despite correct button press | Move other wireless devices away, pair within a foot |
| Stale connection | Random freezes or half‑movement | Power‑cycle base and remote, then re‑pair |
By running through these steps, you’ll usually get your electric adjustable bed remote australia back in sync without a service call. And the next time you’re half‑asleep and need that perfect head‑up angle, the remote will be ready to obey.
Step 4: Enhancing Comfort with Advanced Features
Now that you’ve got the remote paired and the basics working, it’s time to treat the bed like a personal comfort assistant. Think of those fancy features as hidden levers that let you fine‑tune pressure points, support a therapy routine, or simply make bedtime feel a little more luxurious.
1. Programmed Preset Sequences
Most electric adjustable bed remotes let you store up to seven positions. The trick is to give each preset a clear purpose. For example, we’ve seen Maya, an NDIS participant, create a “Therapy” preset that lifts the head 30° and the foot 15°, then activates a low‑intensity lumbar massage for 10 minutes. She taps the button once a night and the whole routine runs automatically – no fiddling with menus while she’s half‑asleep.
To set one up, press the “Save” or “Memory” button (varies by model), adjust the head, foot, and lumbar until you hit the sweet spot, then confirm. Label it with a short phrase like “Reading” or “Leg‑Up”. You’ll thank yourself when you’re reaching for the remote after a long day and the bed is already where you want it.
2. Incremental Micro‑Adjustments
Did you know you can move the head or foot sections in five‑degree steps? Those tiny tweaks are a game‑changer for chronic‑pain sufferers. Picture Jim, an 82‑year‑old who struggles with lower‑back stiffness. By nudging the head up just 5°, his spine aligns better, reducing the need for pain medication.
To use micro‑adjustments, hold the up or down arrow for a second – the remote will switch from five‑degree jumps to a smoother glide. Some newer models even let you set a “soft‑step” mode in the settings menu, which you can enable via the remote’s menu button. It feels like the bed is listening to your body in real time.
3. Integrated Massage Modules
If your bed has built‑in massage, experiment with the three intensity levels and four massage patterns. A quick 3‑minute massage on the lumbar area before you settle in can improve circulation and ease tension. For seniors, the “Gentle” setting is usually best – it provides a soothing vibration without overwhelming fragile joints.
Pro tip: combine massage with a preset. Save a position that includes a 5‑minute “Pulse” massage on the lumbar, then hit the preset button before you drift off. The bed will finish the massage and stay in the therapeutic angle, helping you wake up feeling less rigid.
4. Timer & Auto‑Return Functions
Some remotes let you set a timer so the bed automatically returns to a neutral flat position after a set period. This is perfect for caregivers who want the bed to lower after a night‑time bathroom visit, reducing the risk of a fall.
To enable, press the timer icon (often a small clock) and select the duration – 15, 30, or 60 minutes are common choices. The bed will stay elevated for the chosen time, then glide back down gently. It’s a subtle safety net that works without any extra hardware.
5. Syncing with Smart Home Assistants
While the remote itself is the core controller, many newer bases also support Alexa or Google Assistant. You can say, “Hey Google, set the bed to Reading,” and the bed will move without you touching the remote. If you have a smart speaker in the bedroom, this voice control can be a lifesaver for someone with limited hand mobility.
To set it up, open the companion app (the same one you used to pair the remote), navigate to “Integrations”, and follow the on‑screen steps to link your Amazon or Google account. Once linked, test a simple command – you’ll hear the bed respond, and you’ll feel like you’re living in the future.
For a deeper dive on app‑based controls and voice integration, check out our comprehensive guide to maintaining your electric adjustable bed. It walks through the exact menu paths for the most popular Sleep Sophie models.
So, what should you try first? Pick one feature you haven’t used yet – maybe the timer or a micro‑adjustment – and give it a weekend test run. Jot down how you feel in the morning; small changes add up to big comfort gains.
Step 5: Maintaining and Replacing Your Remote
Let’s be honest: a stubborn bed remote can derail a good night’s sleep. You reach for the handset after a long day, and nothing happens. It’s frustrating, especially for anyone coping with chronic pain, sleep therapy needs, or senior mobility concerns.
In our experience at Sleep Sophie, the simplest maintenance routine keeps your remote reliable—no tech support calls required. If you’re shopping for an electric adjustable bed remote australia, the basics still hold: a fresh battery, a clean connection, and a quick reset when things feel sluggish.
Here at Sleep Sophie, we’re Australia’s leading provider of electric adjustable beds, and we’ve learned that a reliable remote saves nights—literally. Consult the official manual for model-specific guidance. It can walk you through model‑level steps and safety checks. Here’s a practical, no-nonsense path you can follow now.
1) Check the battery and keep spare coin cells
Most remotes use a small coin cell. When the LED starts to flicker or the response slows, it’s time for a swap. Keep a spare on your bedside drawer so you’re not rummaging in the middle of the night. It’s a tiny habit that saves big headaches.
Tip: label a couple of spare batteries and note the date you replaced them. A 1‑minute swap can restore instant responsiveness.
2) Power‑cycle the base and re‑pair
If the bed acts jumpy or the buttons lag, unplug the base for 60 seconds, then plug it back in and let it boot. A fresh start clears glitches. During pairing, keep the remote close—within about a foot—for a clean handshake.
3) Create and test presets
Five to seven saved positions save you from hunting for buttons at 3 a.m. Name them clearly, like “Reading” or “Therapy.”
Test them in the dark to ensure they hold as you move.
4) When to replace the remote
If repeated resets and battery swaps don’t fix the issue, the remote may be showing its age. Sleep Sophie and our partners can advise on replacements and compatibility. Replacing early prevents unsafe pauses in movement during transfers or overnight adjustments.
5) Care and safety tips for caregivers
- Keep the remote clean and dry; wipe with a soft cloth, not a dripping spray.
- Store it on a stable table, not a cluttered nightstand where it can get knocked.
- Use the bed’s stop button if motion feels off—safety first.
For deeper, model‑specific steps, refer to the Avante SmartFlex guide thanks to this resource: Avante SmartFlex 23 Manual. It’s a solid reference to keep you confident with your setup in 2026.
So, what should you do next? Grab fresh batteries, run a quick power cycle, and save a couple of tested presets. With a little routine, your electric adjustable bed remote australia stays responsive and you stay in control of your comfort.
Optional step: have a backup remote on hand so you’re never left stranded if one quits. Sleep Sophie can guide replacements and confirm compatibility in 2026.
Today. Keep your remote stock tidy and your night routine simple, every single night for comfort.
Conclusion
So, you’ve walked through everything from battery swaps to pairing tricks, and you’re probably thinking, “Will my electric adjustable bed remote australia keep up with my nightly routine?” The short answer is yes – with a few simple habits you’ll stay in control.
First, treat the remote like any other essential tool: fresh batteries, a quick power‑cycle when it feels sluggish, and a spare on hand. A one‑minute swap of a CR2032 coin cell can save you from a midnight scramble.
Second, lock in your favourite positions. Naming presets such as “Reading”, “Therapy” or “Leg‑Up” turns a handful of button presses into instant comfort, especially for seniors or NDIS participants who need reliable, repeatable moves.
Third, keep the remote clean and within arm’s reach of the base during the initial pairing – that foot‑to‑head handshake is the foundation for a stable connection.
What’s the next step? Grab a fresh battery, run a quick power cycle, and program two presets tonight. If anything feels off, revisit the checklist we covered and you’ll be back to smooth adjustments in no time.
At the end of the day, an electric adjustable bed remote australia is more than a gadget; it’s a small piece of technology that lets you reclaim comfort and safety. Keep it tidy, test it regularly, and let every night end on a perfectly supported note.
FAQ
What is an electric adjustable bed remote and how does it work in Australia?
Think of it as a pocket‑size control panel that talks to the motorised base of your bed. In most Aussie models the remote sends a low‑power Bluetooth or radio signal, telling the head, foot and lumbar sections to lift or lower in five‑degree steps. Because it’s battery‑powered, you can keep it by the bedside and adjust without getting up.
Do I need a special battery for my electric adjustable bed remote australia?
Yes – the majority use a CR2032 coin cell. When the LED starts flashing amber, that’s the battery’s way of saying it’s time for a swap. Keep a spare in your night‑stand drawer; a one‑minute change saves you from a midnight scramble. Fresh batteries also keep the signal strong, which is key for reliable pairing.
How far should the remote be from the base during the first pairing?
Keep it within about a foot (30 cm). The initial handshake is finicky, and a short distance ensures a clean signal. Once paired, the connection will stay solid even if you move the remote across the room, but that first close‑up step prevents frustration.
My remote is lagging – what quick fixes can I try before calling support?
First, check the battery – a low cell is the most common culprit. Next, power‑cycle the base: unplug for 60 seconds, plug back in, and let the lights settle. Do the same with the remote by holding the power button for a few seconds. Finally, make sure no Wi‑Fi routers or cordless phones are sitting right on top of the bed; a little distance can clear interference.
Can I program multiple presets for different users, like a senior and an NDIS participant?
Absolutely. Most remotes let you save up to seven positions and label them with simple names – “Reading”, “Therapy”, “Leg‑Up”. When a caregiver needs the bed at a low step for a safe transfer, they just hit the “Low‑Step” preset. For an NDIS client, a “Therapy” preset can lift the head and foot while turning on a gentle lumbar massage, all with one tap.
Is there a safety lock that stops the bed from moving unexpectedly?
Yes – every reputable electric adjustable bed remote australia includes a dedicated “Stop” button that cuts power instantly. Many models also lock motion when the side rail is engaged, which is a lifesaver for seniors getting in and out of bed. If you ever feel the bed moving on its own, press the stop button and then check the battery and pairing.
How often should I clean and maintain the remote to keep it working smoothly?
A quick wipe with a dry cloth every few weeks is enough; avoid spraying liquid directly onto the remote. Keep it dry and store it on a stable nightstand, not on a cluttered surface where it can get knocked. Regularly inspect the battery compartment for corrosion, and replace the CR2032 as soon as the LED warns you. These simple habits keep the remote responsive night after night.
Additional Resources
Feeling a bit stuck after you’ve set up your electric adjustable bed remote australia? You’re not alone – a lot of people hit the same roadblocks when they want to fine‑tune angles or replace a dead battery.
First up, the Avante Ultimate Flex manual is a goldmine for anyone who wants the nitty‑gritty on button layouts, Bluetooth pairing ranges, and troubleshooting codes. It breaks down each function step‑by‑step, so you can verify whether a “no‑response” blink means low battery or a signal hiccup.
If you’re looking for a quick replacement part, the Okin remote controller kit fits a range of Australian bases and comes with clear pairing instructions. It’s especially handy for NDIS participants or seniors who need a reliable handset without digging through the warranty paperwork.
Pro tip: keep a one‑page cheat sheet by your bedside that lists the battery type (usually CR2032), the distance for the first pairing (about a foot), and the “stop” button location. A glance at that sheet can save you a midnight scramble.
Got another question? Jot it down, search the manuals above, and you’ll probably find the answer without a service call. Happy adjusting!
Remember, a well‑maintained remote not only protects your comfort but also extends the life of the whole bed system, saving you time and money in the long run.