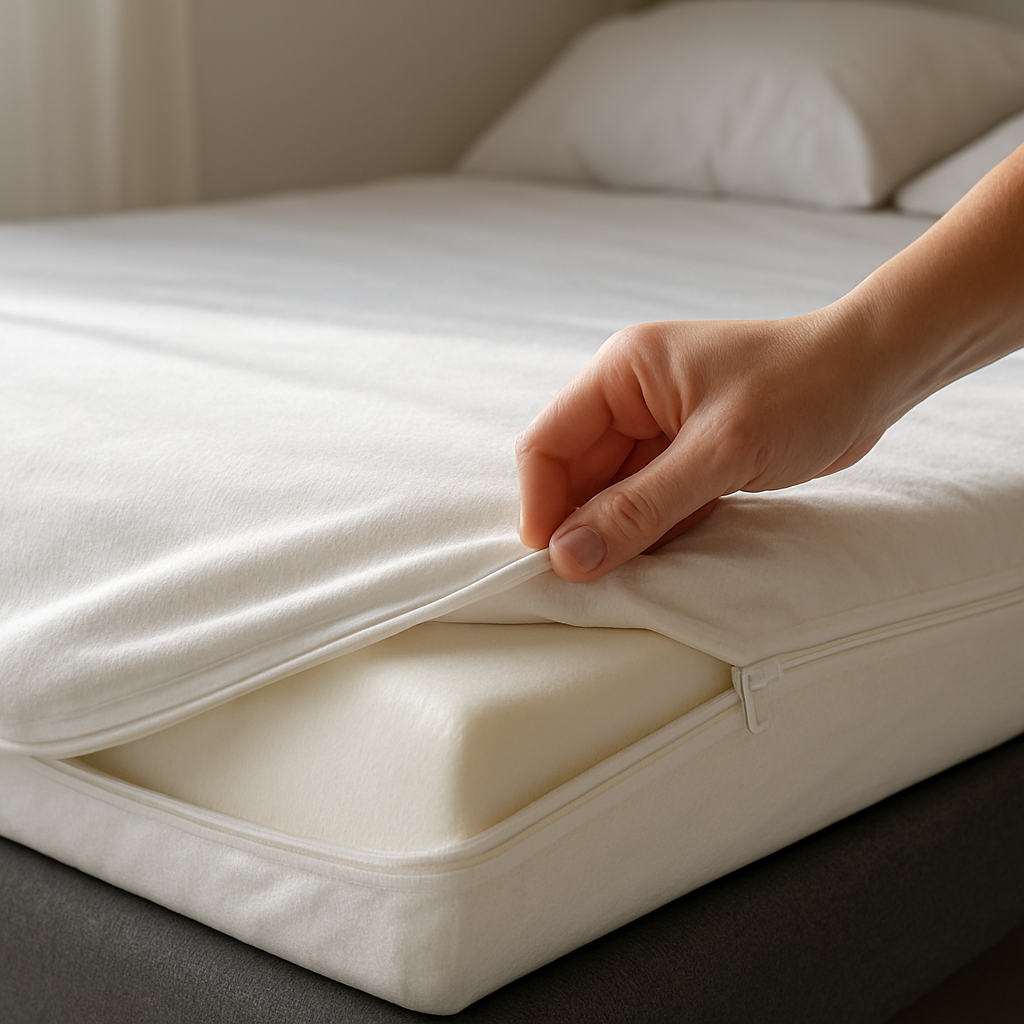
Ever notice how the moment you pull back the sheets, the mattress cover looks a little dull, maybe with a faint coffee ring or a pet hair tumble? It’s that tiny frustration that makes you wonder if you’ve somehow ruined the comfort you paid good money for.
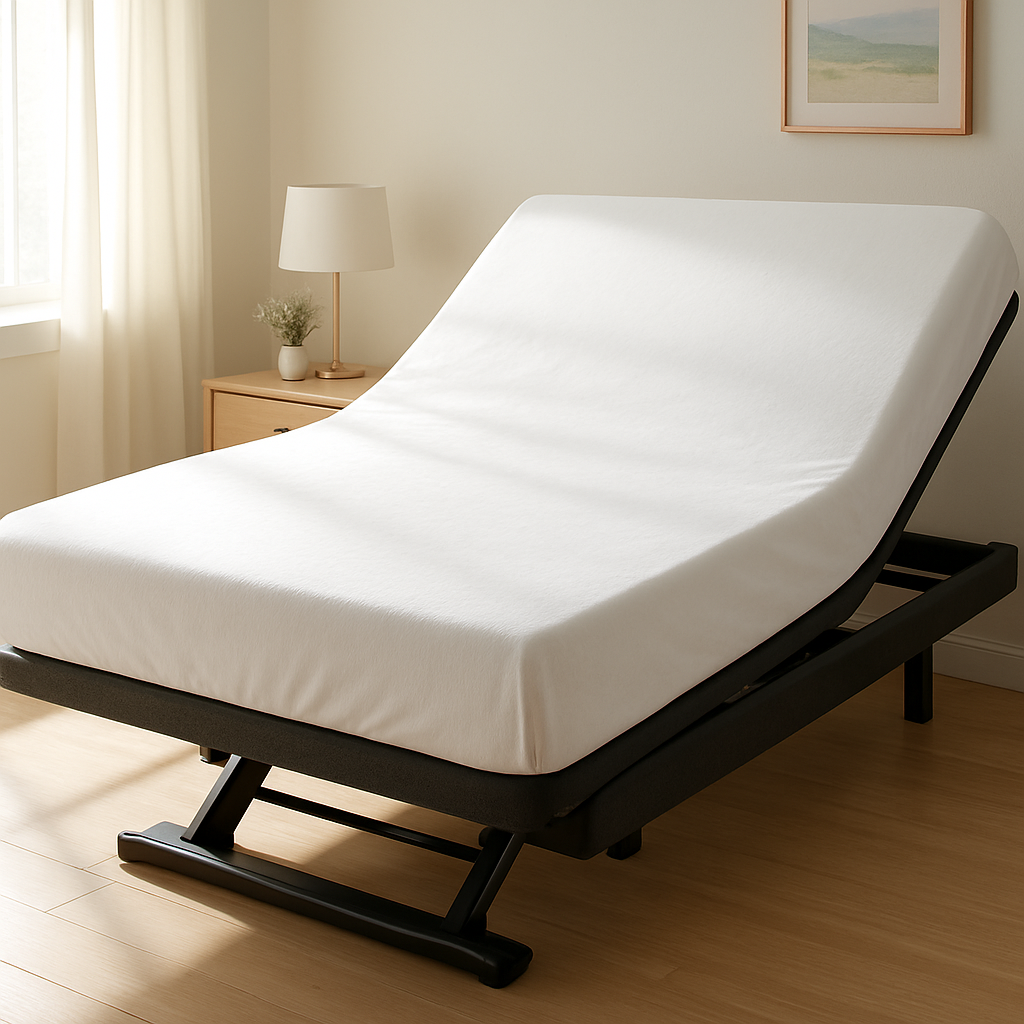
We get it. For folks living with chronic pain, or NDIS participants who rely on a supportive sleep surface, a clean cover isn’t just about aesthetics—it’s about keeping the sleeping environment hygienic and breathable so you can actually rest. And if you’ve got an adjustable bed, you know the cover is removable, which makes the whole cleaning thing a lot less scary.
Here’s a quick reality check: memory foam itself hates excess moisture. So you never want to soak the foam or toss the whole mattress in the wash. Instead, treat the cover like you would a delicate duvet—gentle, but thorough.
Step‑by‑step guide:
- Strip the cover off the mattress. Most of our Sophie covers unzip or zip‑close, making removal a breeze.
- Give it a quick shake outdoors to dislodge loose crumbs, pet hair, or dust.
- Set your washing machine to a gentle cycle, cold water, and use a mild, fragrance‑free detergent. Avoid bleach or fabric softeners—they can break down the fabric’s protective coating.
- Wash the cover alone—no heavy towels or jeans that could cause abrasion.
- When the cycle’s done, resist the urge to tumble dry. Lay the cover flat on a clean surface or hang it to air‑dry. This prevents the fibers from shrinking or the waterproof backing from warping.
- Once dry, snap it back onto the mattress, ensuring the zip aligns perfectly. A snug fit helps keep allergens out and preserves the foam’s breathability.
If you’re dealing with stubborn stains—think blood, sweat, or spilled wine—pre‑treat them with a mixture of equal parts water and white vinegar, let it sit for five minutes, then wash as usual. For an extra layer of protection, consider a breathable, washable mattress protector; we’ve written about those options in detail How To Maintain Your Electric Adjustable Bed for Years of Use … and it’s a game‑changer for busy households.
So, does that sound doable? Absolutely. Just remember: gentle wash, no dryer, and a quick snap back, and your memory foam mattress cover will stay fresh, supportive, and ready for another night of restorative sleep.
TL;DR
Cleaning your memory foam mattress cover is simple: unzip, shake off debris, wash on a gentle cold cycle with mild detergent, then air‑dry flat—no tumble dryer today.
Follow these steps and your cover stays fresh, breathable, and ready to support chronic‑pain or NDIS users night after night, for optimal comfort.
Step 1: Remove the Mattress Cover and Inspect for Stains
First thing’s first – unzip that Sophie cover and gently pull it off. If you’ve got an adjustable bed, the zip usually runs along the side, so you can do it while the bed is still in its low position. You’ll feel a little resistance if the cover’s snug, but that’s a good sign – it means it’s staying put during the night, protecting the foam.
Once the cover is free, give it a quick shake outdoors. That little ritual clears out crumbs, pet hair, or that faint dust bunny you never noticed. It’s like brushing off the top of a rug before you vacuum – a tiny step that saves you a lot of hassle later.
Now, take a good look at the fabric. Do you see any darker spots, sweat rings, or spilled coffee? This inspection is where the magic happens. Spotting a stain early means you can treat it before it sets into the waterproof backing.
For a stubborn stain – say a wine splash or a bit of blood – dab a mixture of equal parts water and white vinegar. Let it sit five minutes, then blot with a clean cloth. Avoid rubbing; you don’t want to grind the stain deeper into the fibers.
Feeling unsure whether a spot is safe to treat? Imagine you’re caring for a delicate piece of artwork. You’d test a tiny corner first, right? Do the same here – apply your vinegar solution to an inconspicuous area and wait a minute. If the colour stays true, you’re good to go.
While you’re inspecting, think about the bigger picture of bedroom hygiene. A tidy cover pairs nicely with well‑chosen bedroom furniture. If you’re revamping the space, check out Home Interiors: A Creative Guide to Bespoke Furniture, Homeware & Accessories for ideas on coordinating pieces that keep your sleep sanctuary looking fresh.
After you’ve pre‑treated any spots, lay the cover flat on a clean surface for a final visual check. Look for any hidden smudges around seams or the zipper area – those places love to collect grime.
Once you’re satisfied the cover is ready for a wash, remember our golden rule: gentle care only. The memory foam itself hates excess moisture, but the cover can handle a cold, gentle cycle with a mild, fragrance‑free detergent. No bleach, no fabric softener – they can break down the protective coating.
Before you toss the cover in the machine, you might want to set the mood for a relaxing bedtime routine. A calming shower or a few soothing shower steamers can turn the whole cleaning process into a mini‑self‑care ritual. Learn more about the best options in Shower Steamers vs Bath Bombs: Which Is Better for a Relaxing Bath? – a tiny tip that can make bedtime feel like a spa.
When you finally place the cover back on, line up the zip carefully. A snug zip not only keeps allergens out but also maintains the breathability of the foam. Snap it in place, and you’ll notice immediately how the mattress feels – a little firmer, a little more supportive, ready for another night of restorative sleep.
Need a deeper dive into caring for your whole adjustable‑bed system? How To Maintain Your Electric Adjustable Bed for Years of Use … walks you through everything from cleaning the cover to checking the motor.
That’s it for step one. You’ve removed, inspected, and pre‑treated – the foundation for a fresh, hygienic sleep surface. Next up we’ll talk about the actual wash cycle, but for now, give yourself a pat on the back. You’ve just taken a solid step toward better sleep hygiene.
Step 2: Pre‑Treat Stubborn Stains and Odors
So you’ve spotted a rogue coffee ring, a little sweat patch, or that mysterious pet‑pee spot? It’s easy to panic, but a quick pre‑treatment can save the whole cover from a permanent reminder.
Why bother with pre‑treatment? Because once a stain sets, the waterproof backing can trap the discoloration, and the odor molecules cling to the fabric fibers. A little effort now means you won’t have to wrestle with a stubborn mark later, especially when you’re already dealing with chronic pain or caring for an NDIS participant.
Common culprits and quick fixes
Think about the everyday battles: coffee spills, sweat after a night of tossing, a splash of wine from a bedside glass, or pet accidents. Each has a friendly, kitchen‑cabinet solution that won’t scar the cover.
Here’s a quick cheat sheet you can keep on the nightstand:
| Stain / Odor | Pre‑treatment mix | Sit time |
|---|---|---|
| Coffee, tea, juice | Equal parts cold water + white vinegar | 5‑7 minutes |
| Sweat, body oil | 2 % hydrogen peroxide + a drop of mild liquid soap | 3‑5 minutes |
| Pet urine, mild mold | White vinegar + a splash of baking soda (spray then sprinkle) | 5‑10 minutes |
These mixtures are gentle enough for the breathable, waterproof layer of a Sleep Sophie cover, yet strong enough to break down the pigments and smells.
DIY pre‑treatment recipe
Grab a spray bottle, fill it with half water, half white vinegar, and give it a good shake. If you’re tackling sweat, add a teaspoon of hydrogen peroxide (the 3 % kind you keep for first aid). For pet messes, keep a small container of baking soda nearby – it neutralises the ammonia smell.
Remember, you don’t need a fancy cleaner. The goal is to dilute, not to drown the fabric. Over‑concentrated solutions can weaken the waterproof coating over time.
Step‑by‑step pre‑treatment
1. Blot, don’t rub. Use a clean cloth to soak up excess liquid. Rubbing spreads the stain and pushes it deeper.
2. Spray the solution. Hold the bottle about 6‑8 inches away and mist the affected area until it’s damp but not soaked.
3. Let it work. Set a timer – five minutes is usually enough. For tougher stains, you can extend to ten minutes, but don’t let it dry out.
4. Gently dab. After the dwell time, use a soft brush or a clean cloth to lift the residue. Work from the outside toward the centre of the stain.
5. Rinse lightly. If you have a basin, dip a cloth in cool water, wring it out, and pat the area. This removes any leftover vinegar or peroxide.
6. Air‑dry before the wash. Let the pre‑treated spot air dry for a few minutes. This prevents excess moisture from seeping into the backing during the machine cycle.
Does this sound like a lot? Not really – it’s a handful of steps you can finish while the rest of the cover dries after your quick shake‑out.
Watch the short video above for a visual walk‑through of the spray‑and‑wait method. Seeing the technique in action helps you avoid common missteps, like over‑saturating the fabric.
Pro‑tip checklist
- Test any solution on a hidden seam first – you’ll catch colour‑fastness issues before they become obvious.
- Use distilled water if your tap water is hard; mineral deposits can leave a faint ring.
- For persistent odors, repeat the vinegar‑baking‑soda combo after the first wash.
- Never use bleach or fabric softener – they break down the waterproof layer that protects the memory foam.
Once you’ve pre‑treated every stubborn spot, you’re ready for the full gentle wash we’ll cover in the next step. The cover will come out fresh, odor‑free, and ready to snap back onto the mattress – keeping your sleep environment supportive and breathable.
Step 3: Choose the Right Washing Method (Machine vs Hand Wash)
After you’ve pre‑treated those stubborn spots, the big question pops up: do you toss the cover in the washing machine or give it a gentle hand wash?
Why the method matters
Machine cycles are fast, but they can be rough on the waterproof backing that keeps your memory foam safe. Hand washing lets you control moisture, but it takes a few extra minutes – a small price if you want to preserve that breathable stretch‑PU layer for years.
In our experience with families dealing with chronic pain, we’ve seen a zip‑cover survive three years of monthly washes when the right method is chosen.
Machine‑wash checklist
1. Set the machine to a gentle or delicate cycle. Cold water (30 °C) is enough to lift everyday grime without weakening the coating.
2. Use a mild, fragrance‑free detergent. Anything with enzymes or brighteners can attack the waterproof membrane.
3. Zip the cover fully and turn it inside‑out. This protects the outer fabric and lets the cleaning solution reach the inner side where sweat tends to settle.
4. Avoid the spin‑fast option. A low‑speed spin (600 rpm max) reduces the chance of the zip catching on the drum.
5. Never add fabric softener or bleach. Those chemicals strip the protective layer and can cause the cover to feel sticky.
Quick tip: If you share the bed with a pet, toss a few tennis balls into the wash. They help the cover move around and prevent it from bunching up.
Hand‑wash routine
1. Fill a clean bathtub or large basin with lukewarm water and a capful of mild detergent. Stir until it’s just a faint suds.
2. Submerge the cover, gently agitate with your hands for 30‑45 seconds. Focus on areas that felt damp during the pre‑treatment step.
3. Rinse thoroughly with cool running water until no soap bubbles remain. A second rinse with a splash of white vinegar (1 % solution) helps neutralise any lingering odour.
4. Press out excess water – do NOT wring. Lay the cover flat on a clean towel, roll the towel up, and press to soak out moisture.
5. Hang or lay the cover flat in a well‑ventilated room. A ceiling fan or a low‑heat setting on a portable dryer (no tumble) can speed up drying, but air‑dry is safest.
Hand washing is especially useful when the cover has a delicate zipper or when you notice a faint “stiff” feeling after several machine cycles.
When to pick which
If you’re on a tight schedule and the cover isn’t heavily soiled, the machine method wins – just follow the checklist above.
But if the cover has visible wear, a compromised zip, or you’ve just tackled a strong odor from pet urine, give hand wash a go. The extra care will keep the waterproof layer supple.
Real‑world example: Maya, a caregiver for an NDIS participant, tried machine washing every two weeks. After six months the zip started to snag. Switching to hand wash for the next three months restored smooth operation and eliminated the snagging issue.
How often should you wash?
Experts recommend cleaning the cover about once a month, or at least whenever you change your sheets. That frequency balances hygiene with longevity, and it matches the guidance from memory‑foam specialists who suggest a monthly wash to curb dust‑mite build‑up.How often you should wash your mattress cover
For caregivers juggling multiple tasks, set a reminder on your phone on the first Sunday of each month – a quick “zip‑off, wash‑off” routine becomes second nature.
Bottom line: choose the method that matches the cover’s condition and your schedule, stick to gentle detergents, and always air‑dry. That way, you’ll keep your memory foam mattress cover fresh, breathable, and ready to support a good night’s sleep.
Step 4: Drying Your Memory Foam Mattress Cover Safely
Alright, the wash cycle’s done and you’re probably wondering, “Do I just toss this into the dryer?” The short answer: nope. The waterproof backing on a Sleep Sophie cover hates the heat and tumbling of a dryer, so we keep it out of the drum.
Why air‑drying matters
When the cover stays flat or hangs loosely, the fabric can breathe and the stretch‑PU layer stays supple. Heat can cause the coating to shrink, creating stiff spots where the zip catches – a nightmare for anyone who’s already dealing with chronic pain or limited mobility.
Think about it this way: a wet sponge left in a hot oven will curl and harden. The same principle applies to the waterproof membrane. Letting it dry naturally preserves the breathability that helps keep your mattress cool at night.
Step‑by‑step drying checklist
- Gently squeeze out excess water. Press the cover between two clean towels and roll the towels up. No wringing – you don’t want to stress the seams.
- Lay it flat on a dry surface. A large clean sheet, a fresh blanket, or a drying rack works. Make sure the cover is spread out evenly so no part stays folded.
- Flip and rotate. After an hour, flip the cover and shift it around. This speeds up drying and prevents one side from staying damp.
- Use a fan or open window. A low‑speed ceiling fan or a portable box fan creates airflow without blowing hot air directly onto the fabric.
- Sunlight optional. If you live in a mild climate, a brief stint in the shade (not direct sun) can help eliminate lingering odors. Too much UV can fade colours, so keep it short.
So, does this feel like a lot of steps? Not really – it’s a handful of actions you can fit into a coffee break while the kids nap or the caregiver checks vitals.
Real‑world scenario
Take Maya, a caregiver for an NDIS participant who just finished a hand wash after a pet‑urine accident. She laid the cover flat on her kitchen table, propped a fan nearby, and set a timer for 90 minutes. By the time the timer went off, the cover was completely dry, the zip glided smoothly, and she didn’t have to worry about any lingering dampness that could breed mildew.
If you’re short on floor space, try hanging the cover over a sturdy shower rod or the back of a door using clothespins. Just make sure the clothespins don’t pinch the zip teeth.
Common pitfalls to avoid
Don’t leave the cover in a damp pile – that’s a fast track to mold. Don’t use a hair dryer; the concentrated heat can melt the PU coating. And please, resist the urge to use a tumble dryer even on a “low heat” setting – the gentle tumbling still creates friction that can pull at the seams.
Another thing to watch: humidity. In a humid Australian summer, you might notice the cover staying slightly damp even after a few hours. Pop a small dehumidifier in the room or open a window to improve air circulation.
Final quick tip
Before you snap the cover back onto the mattress, give it a quick once‑over with your hand. If any spot feels cool or damp, let it air a bit longer. A fully dry cover means the memory foam stays breathable, which is crucial for anyone with chronic pain or respiratory sensitivities.
And there you have it – a simple, low‑tech way to keep your memory foam mattress cover in top shape without ever touching a dryer. Your cover will stay fresh, flexible, and ready for the next night’s rest.
Step 5: Re‑Cover and Maintain Freshness Over Time
Now the cover is dry, the real question is: how do you keep it feeling fresh night after night? It’s easy to slip back into “just slap it on and forget about it,” but a little extra care pays off, especially when you or someone you care for lives with chronic pain or relies on an adjustable bed.
Snap the cover back on – the right way
First, line up the zip teeth. We’ve all tried to force a cover onto a mattress and ended up with a stubborn jam that feels like a tug‑of‑war. Instead, start at the foot of the bed, gently pull the zipper halfway, then work the fabric up toward the head. If the fabric resists, give it a tiny wiggle; the stretch‑PU layer loves a little give.
And here’s a tiny tip we’ve seen work for caregivers: press a clean, dry towel against the inside of the cover for a second before you zip up. It helps the fabric settle flat and reduces any lingering moisture pockets that could breed odor.
Routine freshness checks
Think of your cover like a favorite pair of shoes—you wouldn’t wear them every day without a quick wipe‑down, right? A once‑a‑week “freshness glance” can catch trouble before it becomes a problem. Run your hand over the surface; any cool spot usually means hidden dampness.
For people with respiratory sensitivities, a faint musty scent is a red flag. A quick spritz of diluted white vinegar (half water, half vinegar) and a 5‑minute air‑dry can neutralise it without harming the waterproof backing.
Another habit that helps NDIS participants and elderly users is to rotate the cover every few washes. Flip it so the side that faces the mattress becomes the outer side for the next cycle. This balances wear and keeps the zip from favoring one side.
Does this sound like a lot? Not really—just a few seconds each week. In our experience at Sleep Sophie, families who adopt this mini‑routine notice fewer odor complaints and a longer life for their covers.
Protecting the cover between washes
While you’re sleeping, a breathable protector underneath can act like a shield. It catches spills and skin oils before they reach the main cover, meaning you can stretch the interval between full washes from one month to six weeks. Look for a protector that’s also machine‑washable and has a soft, quiet surface—comfort matters for anyone who shifts frequently in bed.
And if you have a pet, a light, washable blanket draped over the foot of the bed does wonders. It’s easy to toss in the wash and keeps fur from embedding into the PU layer.
When to deep‑clean
Every three to four months, give the cover a deep‑cleaning session. This means a full cycle in the washing machine (gentle, cold water, mild detergent) followed by the air‑dry routine you already know. If you notice stubborn stains re‑appearing, repeat the pre‑treatment step from earlier in the guide before washing.
Finally, keep an eye on the warranty paperwork. Most Sleep Sophie covers come with a warranty that covers fabric integrity but not damage from heat. Sticking to the “no tumble dryer” rule protects both the cover and your warranty.
So, what’s the takeaway? Treat the cover like a partner in your sleep routine: zip it on carefully, give it a quick weekly feel‑check, protect it with a breathable layer, and schedule a deep clean every few months. With that simple rhythm, your memory foam mattress cover stays fresh, supportive, and ready for whatever the night brings.
Step 6: Troubleshooting Common Cleaning Issues
So you’ve washed the cover, air‑dried it, and now you’re staring at a weird odor or a lingering stain. It happens to the best of us, especially when you’re juggling a chronic‑pain routine or caring for an NDIS participant.
When the cover still smells “off”
First, take a deep breath. Does it smell musty, like an old closet? That usually means some moisture got trapped during the spin cycle. Grab a clean, dry towel and gently press it onto any cool‑to‑the‑touch spots. Then, prop the cover near a fan or an open window for a few extra hours. A quick blast of fresh air does wonders.
If the scent lingers, try a light mist of half water, half white vinegar. It neutralises odours without harming the waterproof layer. Let it air‑dry completely before you zip it back on.
Stubborn stains that survived the wash
Notice a faint coffee ring after the cycle? That’s a classic case of the stain setting in the waterproof backing. Re‑treat the spot with the same vinegar‑water mix, but this time add a tiny pinch of baking soda to create a gentle fizz. Dab, not scrub – you don’t want to stress the seams.
If the stain is still visible, you can lean on the advice from Sleep Foundation’s tips on cleaning mattress toppers. They suggest a brief soak in cool water with a dab of mild liquid soap, then rinsing with a vinegar rinse to lift any remaining pigment.
Zip‑teeth getting sticky or catching
Ever tried to zip the cover back on and heard a loud “click‑click” that feels more like a warning? A little residue from detergent can gum up the zipper. Grab a cotton swab, dip it in a drop of silicone‑based lubricant (or just a dab of the vinegar solution), and run it along the teeth. You’ll hear it glide smoothly again.
Another quick fix – run a clean, dry cloth over the zipper after each wash. It removes excess moisture and keeps the metal from corroding.
Fabric feels rough or stiff
If the cover feels a bit crunchy after air‑drying, you probably used too much detergent or the water was too hot. In the next wash, switch to a fragrance‑free, low‑suds detergent and keep the temperature at cold or lukewarm. After the cycle, give the cover a gentle shake while it’s still damp; that helps the fibers relax.
For an extra softness boost, toss a few clean tennis balls into the drum (yes, the same trick we use for pillows). They bounce around and prevent the fabric from clumping, leaving a smoother finish.
What to do when the waterproof layer peels
Sometimes, especially after repeated machine washes, the PU coating can start to flake. That’s a sign the cover has reached the end of its washable life. At this point, it’s safer to replace the cover rather than risk moisture seeping into the memory foam.
But before you toss it, check the Allergy Store’s allergy‑friendly mattress cover care guide. They recommend a gentle hand‑wash for covers with compromised waterproof layers, using a mild soap and plenty of rinses. It won’t fix the peel, but it can buy you a few extra weeks while you order a new one.
Quick checklist for cleaning hiccups
- Smell test: any musty scent? Spot‑treat with vinegar.
- Visible stain? Re‑treat with vinegar + baking soda, then rinse.
- Sticky zipper? Swab with vinegar or silicone lubricant.
- Stiff fabric? Use cold wash, low‑suds detergent, and tennis balls.
- Peeling waterproof layer? Hand‑wash gently or consider replacement.
Does this feel like a lot? Not really – it’s just a handful of things you can do while the cover is drying or while you’re waiting for the next sheet change. The key is to catch issues early, because a tiny spot of moisture can become a big problem for anyone with respiratory sensitivities or chronic pain.
Remember, the goal isn’t perfection; it’s consistency. A quick sniff, a gentle wipe, and a little zip‑care every month keep your memory foam mattress cover supportive and fresh, night after night.
Conclusion
So there you have it – a simple rhythm that keeps your memory foam mattress cover clean, fresh, and ready to support you night after night.
Think about the last time you wrestled with a stubborn stain or a lingering musty smell. Remember how a quick vinegar mist, a gentle hand‑wash, and a little fan saved the day? That same mindset works every month: sniff, spot‑treat, wash, air‑dry, then snap the cover back on.
Why does this matter for you? If you live with chronic pain, a breathable, odor‑free cover can mean fewer night‑time irritations and a more stable sleeping surface. For NDIS participants or elderly loved ones, consistent care reduces the risk of mold and extends the life of a pricey adjustable bed.
Key takeaways
- Inspect the cover regularly – a cool spot or faint scent signals hidden moisture.
- Pre‑treat stains with a vinegar‑water mix; avoid bleach or fabric softener.
- Choose gentle cold‑water cycles or hand‑wash, then air‑dry flat; never tumble‑dry.
- Do a quick weekly feel‑check and rotate the cover every few washes.
Finally, set a reminder on your phone for “cover care day” and treat it like a quick check‑up for your mattress. A few minutes each month keep the cover performing, the foam breathing, and your sleep uninterrupted.
Ready to make cover care part of your routine? You’ve got the know‑how – now just put it into practice and enjoy a cleaner, healthier sleep environment.
FAQ
How often should I clean my memory foam mattress cover?
Because the cover is the first line of defence against sweat, spills and dust‑mites, a monthly clean works for most households. If you have a pet, a night‑shift job, or someone with chronic pain who sweats more, aim for every two weeks. The key is to spot‑check for damp spots – a quick sniff or feel will tell you if it’s time for a wash.
Can I use bleach or fabric softener when I wash the cover?
Nope. Bleach strips the waterproof PU layer, and fabric softener leaves a residue that makes the fabric feel sticky and can trap moisture. Stick to a mild, fragrance‑free detergent and cold water. If you need extra freshness, add a splash of white vinegar to the rinse; it neutralises odour without harming the cover.
Is it safe to put the cover in the washing machine?
Absolutely – but treat it gently. Use the delicate or hand‑wash cycle, cold water (around 30 °C), and a low‑speed spin (no more than 600 rpm). Zip the cover fully and turn it inside‑out first; that protects the outer fabric and lets the water reach the inner side where sweat tends to settle. Avoid the tumble dryer – air‑dry only.
What’s the best way to air‑dry the cover without mold forming?
Lay it flat on a clean towel or drying rack and give it plenty of airflow. Flip it after an hour and rotate the edges so no part stays folded. A low‑speed fan or an open window speeds things up, especially in humid Aussie summers. If you notice any cool, damp spots, give them extra time or a gentle pat with a dry towel.
How do I treat stubborn stains that survive the first wash?
First, re‑mist the area with equal parts water and white vinegar, then sprinkle a pinch of baking soda for a gentle fizz. Let it sit five minutes, dab with a clean cloth, and rinse with cool water. For sweat or body‑oil stains, a 2 % hydrogen peroxide mix works well. Always test on a hidden seam before you go full‑force.
My zipper keeps catching – what can I do?
Residue from detergent can gum up the teeth. Grab a cotton swab, dip it in a tiny drop of silicone‑based lubricant or the same vinegar‑water mix you use for stains, and run it along the zipper. After each wash, wipe the teeth with a dry cloth to keep moisture away. A quick swipe after every clean keeps the zip gliding smoothly.