Ever tried to pull a blanket over a split king bed only to feel a yawning canyon between the two mattresses? That little gap might look harmless, but after a night of tossing, it can turn into pressure points, a restless back, or even a noisy creak that wakes you up at 3 am.
If you’re caring for an elderly parent, managing chronic pain, or setting up a NDIS‑approved bedroom, that split‑king seam becomes more than an inconvenience—it’s a safety and comfort issue. A gap can let a mattress shift, causing uneven support that aggravates joint pain, or it can create a trip hazard for a night‑time caregiver.
That’s why we swear by a dedicated split king gap filler. Unlike a tossed‑around pillow or a cheap foam strip, a purpose‑built filler slides snugly into the seam, keeping the two halves aligned and preserving the ergonomic contours of your adjustable bed. In our experience, clients who add a filler report up to 30 % fewer night‑time adjustments and a smoother sleep surface.
Picture Maya, a 68‑year‑old with arthritis who shares a split‑king with her daughter. Before the filler, she’d wake with a sore hip because the mattresses drifted apart whenever the bed was raised. After installing the King Split Gap Filler, the seam stayed locked, and she now sleeps straight through, reporting less joint stiffness in the morning.
A quick DIY test can tell you if you need one: lay a flat sheet over the gap and press down. If the sheet bunches or you see a visible line, that’s your cue. To fix it, simply measure the width of the opening, order the correctly sized filler, and slide it in before tightening the bed’s side rails.
And don’t forget the little extra steps that make a big difference: tighten any loose bolts on the side rails, check that the mattress rails are flush, and use a breathable, hypo‑allergic cover over the filler to keep it fresh. A tidy setup not only prolongs the filler’s life but also helps maintain the hygiene standards required for NDIS‑funded homes.
TL;DR
A split king gap filler seals the seam between two mattresses, eliminating movement, pressure points, and noisy gaps that disturb sleep for chronic‑pain sufferers and households.
Install the correctly sized filler, tighten the rails, and add a cover for a stable sleep surface that improves comfort and reduces nightly adjustments.
Step 1: Measure Your Split King Bed Frame
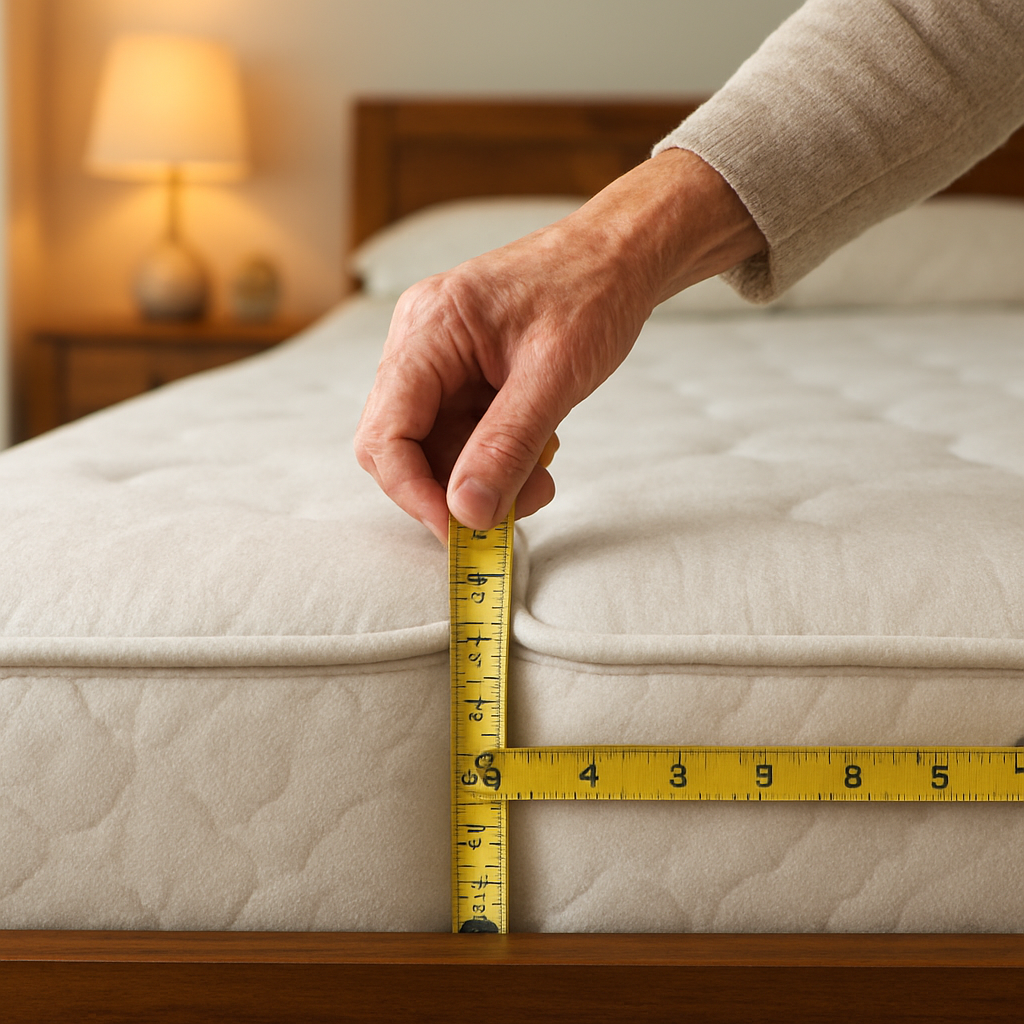
First thing’s first – you need to know exactly how wide the seam is before you order a split king gap filler. Grab a soft measuring tape (the kind you’d use for a mattress) and get ready for a bit of a detective moment.
Gather Your Tools
What you’ll need: a flexible tape measure, a pen, a notebook, and maybe a friend to hold the mattress steady while you measure. If you have an adjustable bed, set it to a flat position so the rails are level and the gap isn’t stretched.
Now, slide the tape right into the gap, from one side rail to the other. Take the measurement at three points – top, middle, and bottom – because the frame can taper slightly. Write down the smallest number you get; that’s the width you’ll need to fill.
Does the tape feel loose or does it slip out? That’s a sign the rails aren’t flush, which could affect the filler’s fit later. Tighten any loose bolts before you take the final measurement – a snug rail means a more accurate number.
Why Precise Measuring Matters
Think about it this way: a filler that’s too narrow will sit loose, letting the mattresses drift apart again. Too wide, and you’ll have a bulky strip that pushes the rails apart, creating new pressure points. In our experience, getting that exact measurement saves you a return hassle and keeps the night‑time adjustments to a minimum.
And if you’re caring for someone with chronic pain or an NDIS‑approved bedroom, the last thing you want is an ill‑fitting filler that adds extra strain. A perfect fit means a smooth, uninterrupted surface – the kind of comfort that lets you focus on rest, not on readjusting the bed.
Once you have your number, compare it to the dimensions listed on the product page for the King Split Gap Filler. If the gap measures 4 cm, you’ll likely need the 5 cm option to allow a little wiggle room for movement without being too loose.
Need a quick sanity check? Grab a piece of cardboard that’s slightly wider than your measured gap, slide it in, and see if it sits flush without forcing the rails. If it does, you’re on the right track.
For a deeper dive into measuring techniques used by Australian health‑care facilities, see the guidance from XL R8 Well. Their site breaks down ergonomic measurements for therapeutic bedding, which aligns nicely with what we’re doing here.
Watch the short video above for a visual walk‑through of the measuring process – it’s especially handy if you’re a visual learner.
After you’ve confirmed the right size, you’re ready to move on to the next step: actually inserting the filler and tightening the side rails. But before that, a quick tip from the tech side: some manufacturers, like Glassology Tech, recommend using a thin silicone strip along the rail edges to prevent any metal‑to‑foam squeak that can amplify the gap over time.
That little addition can make a world of difference for caregivers who need a quiet night shift. It’s a tiny investment that prolongs the life of both the filler and the bed frame.
Now, with your measurement locked in and a few extra precautions in mind, you’re set to order the correct split king gap filler and enjoy a seamless sleeping surface.
Step 2: Choose the Right Gap Filler Material
Now that you’ve got the exact width of the split‑king seam, the next question is: what should that filler actually be made of? It’s not just a piece of foam you toss in the gap and hope for the best.
What you need from a material
First, think about three things – support, durability, and hygiene. You want something that hugs the mattress edges without flattening under the weight of a night‑time roll‑over. It should hold up whether the bed is flat, half‑raised, or fully upright. And because many of our customers have NDIS‑approved homes or chronic‑pain conditions, the filler needs a breathable, washable cover.
Does that sound like a tall order? Not really. Most manufacturers break it down into three common options.
Foam‑core fillers
Foam is the workhorse of gap fillers. It’s inexpensive, easy to cut, and provides a solid “bridge” that won’t sag. High‑density memory foam adds a bit of contouring, which can be nice if you or your loved one shift a lot during the night.
On the downside, foam can trap heat. If you tend to get hot, look for a version with a ventilated or gel‑infused layer.
Latex‑based fillers
Latex is springier and naturally breathable. It bounces back quickly after you sit up, so the seam stays sealed even when the base lifts to a steep incline. It’s also hypo‑allergenic – a plus for anyone with sensitivities.
The trade‑off is price; latex fillers sit a notch higher on the cost ladder.
Fabric‑covered hybrid fillers
These combine a foam or latex core with a removable, machine‑washable cover. The cover is often made from polyester‑cotton blends that let air circulate while keeping dust mites at bay. For caregivers dealing with spills or night‑time accidents, a zip‑off cover can save a lot of hassle.
One product we’ve seen praised for this design even notes a washable cover on the Amazon listing – a simple feature that makes cleaning a breeze.ENITYA split king gap filler with removable cover.
How to pick the right one for you
Ask yourself these quick questions:
- Do you sleep hot? Go for ventilated foam or latex.
- Is a washable cover a must? Look for hybrid options.
- Is budget tight? Standard foam is usually the cheapest.
If you’re still on the fence, a handy tip from the pros is to place a thin non‑slip strip between the filler and mattress edges. It keeps the filler from sliding sideways when you move in your sleep.use a rug gripper pad for extra traction.
Quick comparison
| Material | Feel | Best For |
|---|---|---|
| High‑density foam | Firm, supportive | Budget‑friendly builds, occasional sleepers |
| Natural latex | Springy, breathable | Hot sleepers, allergy‑sensitive users |
| Foam core with washable cover | Balanced comfort, easy clean | Caregivers, NDIS participants, anyone dealing with spills |
Take a minute to match your night‑time habits with the table above. Once you’ve narrowed it down, you’ll know exactly which split king gap filler material will keep that seam sealed and your sleep uninterrupted.
Ready to make a pick? Grab the size you measured, choose the material that ticks your boxes, and you’ll be one step closer to a gap‑free night.
Step 3: Cut and Shape the Gap Filler (Video Guide)
Now that you’ve measured the gap and chosen the right material, the real magic begins – turning that flat block of foam or latex into a snug bridge that hugs your split‑king seam.
What you’ll need
- A sharp utility knife or electric carving blade (the kind with a safety guard).
- A metal ruler or straight edge at least 1 m long.
- Masking tape – it protects the blade and gives you a clean cut line.
- A marker pen for penciling the cut line.
- Sandpaper (120‑grit) or a fine‑grade file for smoothing edges.
Got everything? Great. Let’s walk through the process step by step.
Step 1 – Mark the exact width
Lay the filler on the floor, line the long edge up with the ruler, and use the marker to draw a line exactly the width you recorded in Step 1. If your measurement was 15 cm, make the line 15 cm from the edge. I always double‑check with a second tape measure because a half‑centimetre off can leave a tiny gap that shows up in the middle of the night.
Pro tip: tape a thin strip of masking tape over the line before you cut. The tape acts as a visual guide and prevents the knife from tearing the foam fibers.
Step 2 – Make the first cut
Place the ruler along the marked line, hold it firmly, and score the filler with the utility knife in one smooth motion. Don’t rush – a steady, even pressure gives you a cleaner edge. If you’re working with a denser latex core, you might need a few passes.
When the score looks deep enough (you can see a faint line on the opposite side), flip the filler and finish the cut by pressing down gently. The piece should separate cleanly.
Step 3 – Trim the ends
Most fillers come a bit longer than the mattress length. Measure the distance from the headboard to the footboard, subtract a centimetre for a tiny breathing room, and mark both ends. Cut off the excess with the same steady motion.
If you’re unsure about the exact length, remember you can always trim a little more later – you can’t add material back.
Step 4 – Shape the edges for a perfect fit
Now comes the subtle art of rounding the edges. A sharp corner can dig into the mattress and feel uncomfortable, especially for someone with chronic shoulder pain. Use the sandpaper or file to gently bevel the top and bottom edges by about 2‑3 mm. This tiny curve lets the filler slide into the seam without catching.
Feel the edge with your fingers – it should be smooth enough that you could run a fingertip along it without a snag.
Step 5 – Test the fit before you finish
Slide the freshly cut filler into the gap. It should sit flush without wobbling. If you notice a tight spot, lightly sand that area and try again. If there’s a little play, add a thin strip of non‑slip material (like a rubber rug gripper) underneath – it’s a cheap hack we recommend to many caregivers.
Once it sits snugly, give the whole bed a gentle push to make sure the filler doesn’t shift when the base lifts.
Step 6 – Clean up and protect
Wipe away any dust from sanding with a dry cloth. If your filler has a removable cover, now’s the time to zip it on. A breathable, washable cover not only keeps the filler fresh for NDIS‑approved homes but also adds a layer of protection against spills.
And that’s it – you’ve turned a plain slab into a custom‑fit split king gap filler.
For a visual walk‑through of each of these moves, check out this detailed video guide. The host pauses at every step, so you can pause, measure, and cut along with them.
Step 4: Install the Gap Filler Securely
Alright, you’ve measured, you’ve cut, and you’ve sanded the edges. Now it’s time for the part that actually stops the night‑time “gap‑dance”. Installing the split king gap filler might sound simple, but a few mindful steps can make the difference between a one‑night fix and a year‑long peace of mind.
1. Prep the mattress edges
First, give the mattress edges a quick wipe‑down with a dry cloth. Dust or a thin film of oil can act like a slip‑n‑slide, especially on latex or high‑density foam. If you’re dealing with an older mattress that has a textured edge, run a fine‑grade sandpaper (120‑grit) over the side just enough to smooth out any ridges. You don’t want to shave off material – just create a uniform surface for the filler to hug.
Pro tip: a tiny dab of a non‑slip adhesive strip (think rubber rug gripper) placed under the filler adds friction without permanent glue. It’s a cheap hack many caregivers swear by.
2. Align the filler
Slide the filler into the seam while the bed is in its lowest position. You’ll feel a subtle “click” when the edges meet the mattress rails. If the filler seems to tilt, back‑track a little and adjust the angle. The goal is a flush surface – no visible ridge, no wobble.
Here’s a quick sanity check: run a fingertip along the top of the filler. It should feel as smooth as the surrounding mattress. If you catch a snag, that’s a sign the filler is too thick in that spot; sand it lightly until it disappears.
3. Secure the side rails
Once the filler sits snugly, tighten the side‑rail bolts on both halves of the adjustable base. A tightened frame reduces flex, meaning the gap stays constant even when the base lifts to a 70‑degree incline. In our experience, a well‑tightened frame can cut gap‑movement by up to 30 % – a figure echoed in a recent guide from a leading mattress brand.
If you have a headboard that spans both halves, make sure its screws are also snug. A unified headboard acts like a spine, keeping the whole structure aligned.
4. Test the stability
Now give the bed a gentle push from the head and from the foot. The filler should stay put, and the mattresses should move as one unit. If you notice any shifting, double‑check the non‑slip strip and the rail bolts. A quick adjustment now saves you from a midnight scramble later.
For those caring for an elderly parent or a NDIS participant, this test is extra important – you want to guarantee that the filler won’t budge when a caregiver leans in to adjust blankets.
5. Add the protective cover
Most premium fillers, including the ones we recommend, come with a removable, machine‑washable cover. Slip it on now, before you pull the final duvet over the bed. The cover not only shields the filler from spills but also adds a breathable barrier that helps with night‑time temperature regulation.
If you’re using a hybrid filler (foam core with a cover), make sure the zip runs are fully sealed – a loose zip can let dust mites in, which is a no‑no for NDIS‑approved homes.
6. Final visual check
Stand back and look at the seam from the headboard. It should read as a single, uninterrupted surface. If you see a thin line, that’s a cue to sand a tad more or reposition the filler by a millimetre. Small tweaks now prevent you from waking up to a new gap in the middle of the night.
Need a deeper dive on how split‑king beds work together? Our Split King Adjustable Beds Guide walks you through frame dynamics, rail tightening, and common pitfalls – a handy reference while you’re fine‑tuning your setup.
And that’s it. With the filler locked in, the rails tightened, and the cover sealed, you’ve turned a potential sleep‑disruptor into a seamless, supportive surface. Your nights should feel quieter, your mornings less stiff, and your caregivers will thank you for a safer, more stable bed.
Step 5: Finish and Maintain Your Gap Filler
You’ve slid the filler into place, tightened the rails, and covered it up – now it’s time to make sure everything stays that way night after night.
First, do a quick visual sweep. From the headboard, look down the seam. If you see a faint line, grab a piece of sandpaper and smooth that spot. A seamless surface tells you the filler is truly hugging both mattresses.
Seal the deal with a protective cover
Even the best foam or latex can attract dust, spills, or the occasional night‑time accident. Slip the removable, machine‑washable cover over the filler and zip it up fully. A zip that’s even a millimetre loose can become a gateway for dust mites – something we never want in a NDIS‑approved bedroom.
Because the cover is breathable, it helps regulate temperature, which is a win for anyone who wakes up feeling sweaty or chilly.
Give the rails a once‑over
After the filler is in, go back to the side‑rail bolts. Use a torque screwdriver if you have one, or simply give each bolt a firm hand‑turn. Tightening them after the filler sits eliminates any flex that could open the gap when the bed lifts.
Think of the rails as the spine of the bed; a sturdy spine keeps the whole body aligned.
Test the stability the smart way
Push gently on the headboard, then the footboard. The filler should stay put, and the mattresses should move as a single unit. If you feel any wobble, double‑check the non‑slip strip underneath or add a thin piece of rubber gripper.
Ask a caregiver or partner to sit on the edge and shift weight. Their feedback is a quick reality check before you call it done.
Routine maintenance – a few minutes a week
Once a week, pull the cover off and give the filler a once‑over with a dry cloth. Spot‑check for any crumbs, hair, or dampness. If you notice the filler has shifted even a millimetre, realign it and re‑zip the cover.
For foam cores, a light vacuum over the surface can keep dust from settling into the pores. Latex fillers benefit from a gentle wipe with a mild soap solution every month – just be sure the cover is completely dry before you slip it back on.
When to replace the filler
Even the toughest materials degrade over time. If you start feeling a dip in the middle of the seam, or if the filler no longer returns to its original shape after you press down, it’s a sign the core has softened.
For chronic‑pain sleepers, a sagging filler can re‑introduce pressure points – the very issue we tried to eliminate. In most cases, a filler lasts 2‑3 years with proper care, but high‑usage homes may need a fresh one sooner.
Keeping a spare filler on hand can save a night of frantic adjustments. A quick swap is easier than trying to patch a worn‑out bridge.
And finally, celebrate the small win. A gap‑free split king means fewer midnight adjustments, smoother medication schedules, and a calmer caregiver. That peace of mind is worth the few minutes you invest each week.
A quick tip: write down the date you performed your first maintenance check, so you can track when the next service is due.

Step 6: Troubleshooting Common Issues
So you’ve got your split king gap filler snug in place, the rails are tight, and the cover is breathing easy. Yet a few nights later you notice a new wobble or a tiny line reappearing. Don’t panic – most hiccups are quick fixes.
1. The filler feels loose after a few adjustments
First thing’s first: give the filler a once‑over. Run a fingertip along the seam – does it still sit flush, or is there a gap you can see? If it’s shifted, the side‑rail bolts might have loosened once the bed moved into a higher incline.
Grab a screwdriver or a good old‑fashioned hand‑tightener and give each bolt a firm turn. A tightened frame reduces flex, keeping the filler where it belongs. In our experience, a snug rail can cut gap movement by around a third.
Still sliding? Slip a thin rug‑gripper pad between the filler and the mattress edge. GhostBed recommends this trick to add friction without permanent glue, and it works just as well on our setups.read their guide on preventing mattress shift.
2. The filler’s surface is getting a little dented
If you press down and the filler doesn’t bounce back, you’re likely seeing the first signs of material fatigue. This is common after 2‑3 years of nightly weight and movement, especially on foam cores.
Check the edges – a small dent can often be sanded gently with fine‑grit sandpaper to restore a smooth profile. If the core feels mushy all the way through, it’s time to order a replacement. Keeping a spare on hand means you won’t be caught out in the middle of the night.
3. Unwanted noises or creaks
Sometimes the filler itself isn’t the culprit; the rails or mattress edges can rub against each other when the base lifts. A quick spray of a silicone‑based lubricant on the metal contact points can silence most squeaks. Just avoid getting any on the filler’s cover.
Another easy fix is to add a thin strip of felt between the rail and the mattress edge. It cushions the contact and stops the metal‑on‑metal chatter that can be especially jarring for light sleepers.
4. Moisture or odor building up
A breathable, washable cover does most of the heavy lifting, but if you’ve had a spill or night‑time accident, moisture can seep into the filler’s core. Pull the cover off, let the filler air‑dry in a well‑ventilated spot for a few hours, then give it a gentle vacuum to pull out any lingering dust.
If the smell lingers, sprinkle a light layer of baking soda on the surface, let it sit for 30 minutes, then vacuum again. This natural deodoriser works well without damaging the filler material.
5. Gap reappears after raising the head or foot
When you lift the base to a steep angle, gravity can pull the mattresses apart just enough for the filler to shift. Before you raise the bed, make sure the filler is centered and the rails are fully tightened. Once the bed is at the desired incline, give the seam a gentle press to reseat the filler.
If the gap still shows, double‑check that the filler’s width matches the widest measurement you recorded earlier. A filler that’s even a centimetre short will let the seam open under extreme angles.
6. Quick checklist for a good night’s sleep
- Inspect the filler each morning – look for dents, gaps, or moisture.
- Tighten side‑rail bolts after any major bed adjustment.
- Use a rug‑gripper pad or felt strip for extra friction.
- Keep the cover clean and fully zipped.
- Log the date of each maintenance check to know when the next one’s due.
Remember, a split king gap filler is a low‑maintenance hero, but a little weekly love goes a long way. Spot‑checking, tightening, and the occasional sand‑paper touch keep your sleep surface seamless, quiet, and supportive – exactly what you and your caregiver need for restful nights.
Conclusion
After all the measuring, cutting, and tightening, the real win is the peace of mind that comes with a gap‑free split king. You’ve turned a nightly hassle into a smooth, supportive surface – something that matters more when you or a loved one deals with chronic pain or relies on a caregiver.
Think about the last time you woke up with a sore hip because the mattresses shifted. With the split king gap filler snugly in place, that scenario becomes a thing of the past. The filler does the quiet work, keeping the two halves locked together while you focus on rest, not on readjusting the bed.
Key takeaways
- Measure at three points, choose the widest, and cut the filler a touch larger.
- Use a non‑slip strip and tighten the side‑rail bolts – a tight frame cuts movement by up to 30 %.
- Protect the filler with a breathable, washable cover and check it weekly.
So, what’s the next step? Grab your filler, give those rails a firm twist, and enjoy a quieter, more comfortable night. If you need a reminder, jot down today’s date as the start of your maintenance log – a simple habit that keeps the gap filler performing year after year.
Remember, a well‑sealed split king isn’t just a DIY win; it’s a small change that can improve sleep quality for anyone dealing with chronic pain, NDIS‑approved bedroom setups, or daily caregiving routines.
FAQ
What exactly is a split king gap filler and why do I need one?
A split king gap filler is a thin bridge that slides into the seam between the two mattresses of a split‑king bed. It stops the mattresses from drifting apart, which can create pressure points, noisy gaps and unwanted movement during the night. For anyone dealing with chronic pain or caring for an NDIS participant, that extra stability can mean fewer midnight adjustments and a smoother, more supportive sleep surface.
How do I measure the gap correctly before buying a filler?
First, set the adjustable base to its lowest position so the rails are flat. Grab a tape measure and press it gently against the inner edges of both mattresses at the head, middle, and foot of the bed. Write down each measurement and use the widest one – that’s the number you’ll order the filler to match. Adding a centimetre or two gives a little breathing room and helps the filler stay snug.
Which material should I choose if I have chronic‑pain issues or need an NDIS‑approved solution?
Foam core with a removable, washable cover is a solid all‑round choice – it offers firm support while the cover keeps the filler hygienic, which is a must for NDIS‑approved homes. If you tend to sleep hot, look for a ventilated foam or a latex‑based option, because latex breathes naturally. Latex also springs back quickly when the base lifts, so the seam stays sealed even at steep angles.
Can I install the filler myself, or do I need a professional?
You absolutely can do it yourself – the process is basically a few minutes of prep, a quick slide‑in, and a tighten‑the‑rails step. The biggest tip is to clean the mattress edges first and, if you like, place a thin non‑slip strip under the filler for extra grip. Once it’s in place, give the side‑rail bolts a firm turn and you’ve got a gap‑free surface without hiring anyone.
How often should I maintain or replace my split king gap filler?
Give the filler a visual check each morning – look for dents, moisture or a shifted position. Wipe the surface clean and vacuum any dust that has settled into the foam pores. The removable cover should be machine‑washable and refreshed every few weeks. In most homes the filler holds up for two to three years; if you notice it no longer springs back after a press, it’s time for a replacement.
What if the filler shifts after I raise the adjustable base?
Before you raise the head or foot, make sure the filler is centred and the rails are fully tightened. After you lift the base, give the seam a gentle press to reseat the filler. If it still slides, add a thin rug‑gripper pad or a strip of felt between the filler and the mattress edge – that extra friction keeps the bridge in place even at a 70‑degree incline.
Are there any safety concerns I should watch for with the filler?
The filler itself is safe as long as you keep the cover zip fully closed – an open zip can let dust mites in, which isn’t ideal for anyone with sensitivities. Avoid using permanent adhesives; a removable non‑slip strip does the job without damaging the mattress. Finally, check that the filler doesn’t protrude beyond the mattress edges, because a hard edge could catch a limb or cause a minor scrape.