Ever caught yourself staring at the remote control of your adjustable bed and wondering if it’s really safe for you or your loved one? You’re not alone. Many Australian seniors feel a mix of excitement and worry when they first try a motor‑driven bed. That’s why we’ve gathered the most practical adjustable bed safety tips for seniors australia, so you can enjoy the comfort without the stress.
The numbers speak for themselves: the Australian Institute of Health and Welfare reports that falls are the leading cause of injury for people over 65, and the bedroom is often the first place a slip can happen. An adjustable bed, if set up wrong, can add an extra tripping hazard or even pinch a limb when the head or foot section moves unexpectedly.
First, keep the area around the bed clutter‑free. Loose rugs, night‑stands that wobble, or cords draped across the floor are invitation cards for a stumble. Lay a non‑slip mat under the bed, and make sure any power cords are routed along the wall or tucked into the built‑in cable management channels most models provide.
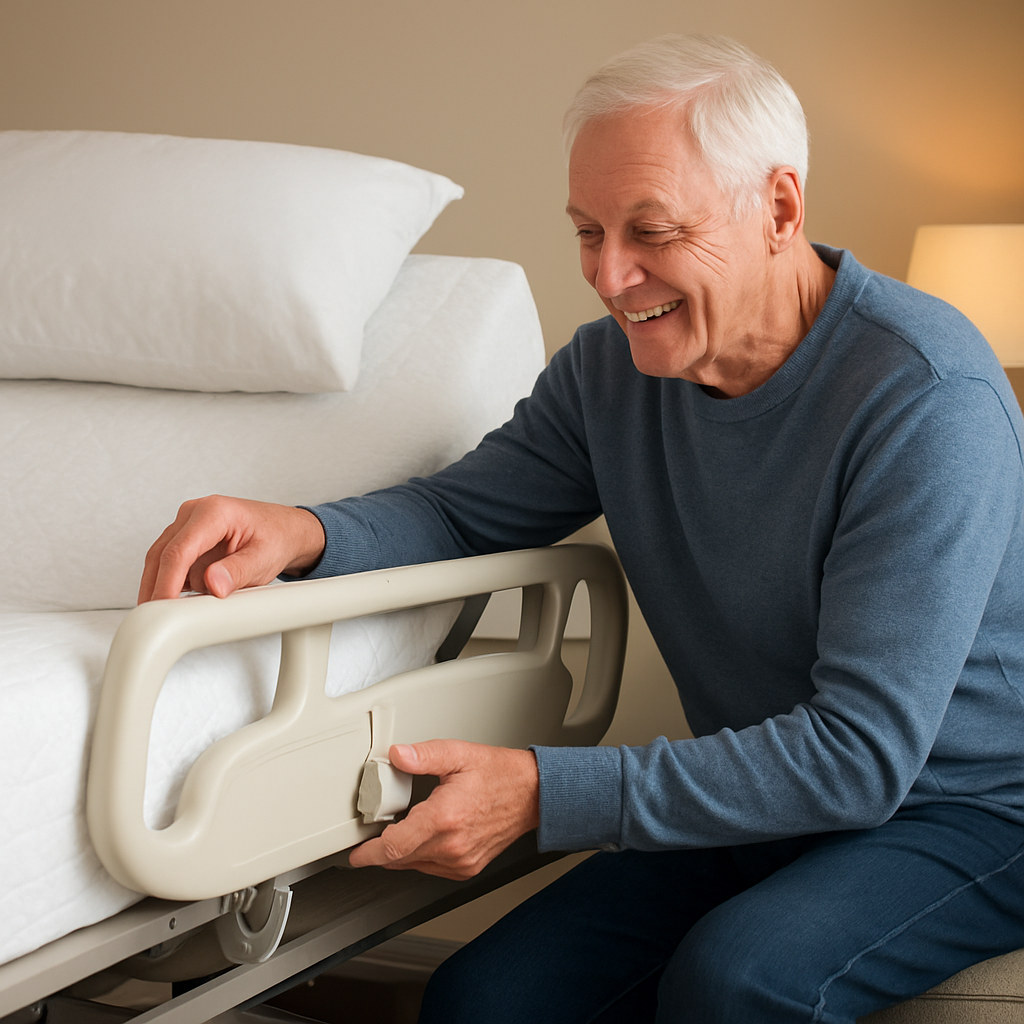
Second, always use the side rails – they’re not just an afterthought. Many seniors think they can skip them because the bed feels stable, but a quick side‑rail test (push gently against the edge) will show you how much support you really have. If the rail feels loose, tighten the bolts or ask a technician to check the motor’s alignment.
Third, get into the habit of testing the remote before you settle in for the night. Press the raise‑head and lower‑foot buttons a few times to confirm smooth movement, and listen for any grinding noises that could signal a mechanical issue. Regular maintenance goes a long way; as a reminder, we often point readers to our guide on 6 Things Seniors should consider before purchasing an Adjustable … for deeper insight on choosing safe models and upkeep.
Fourth, involve a caregiver or family member in the daily routine. Have them check that the bed is fully locked in place after each adjustment, and keep a phone or medical alert device within arm’s reach. Simple steps like setting the “stop” button within easy reach can prevent accidental over‑extension, especially for users with limited hand strength.
Finally, think ahead to emergencies. Program the remote to return to a flat position with the press of a single button, and note where the manual release lever is hidden – it can be a lifesaver if the power fails. By weaving these safety habits into your bedtime ritual, you turn a high‑tech bed into a trustworthy ally for restful, worry‑free nights.
TL;DR
Our quick guide delivers essential adjustable bed safety tips for seniors australia, helping you prevent falls, pinches, and nighttime mishaps with simple daily checks.
Follow these practical steps—clear floor space, secure side rails, test the remote, and know the manual release—to ensure peace of mind every night for you always.
Step 1: Choose the Right Adjustable Bed Features for Senior Safety
When you’re picking an adjustable bed for a loved one, it’s not just about comfort – it’s about peace of mind. Imagine you’re helping Grandma settle in for the night and you notice the head‑lift button is a bit stiff. That tiny friction could turn into a pinch or a sudden jerk later on. So, let’s walk through the features that actually keep seniors safe.
Side‑rail design that really works
First up, side rails. Not all rails are created equal. Look for models with a lock‑in mechanism that clicks solidly into place and a padded interior that won’t snag clothing or skin. A quick “push‑test” – gently lean on the rail – should feel firm, not wobbly. If the rail can be folded away, make sure the latch stays engaged when it’s down; a loose latch can become a tripping hazard.
Our own Sophie HiLo line, for example, includes side‑rails that auto‑lock when the bed is raised, cutting down on the chance of an accidental fall.
Quiet, smooth motors
Noise isn’t just annoying; a grinding motor can signal wear that might cause the bed to move unexpectedly. Choose a bed with a silent, brushless motor and a “soft‑start” feature – the bed eases into motion instead of jerking. That way, if a senior reaches for the remote in the dark, the bed won’t surprise them.
Pro tip: Test the remote on a low‑speed setting first. If you hear any whine, it’s worth asking a technician to check the alignment before you bring the bed home.
Weight capacity and mattress support
Don’t overlook the weight rating. A bed that’s undersized for the user can sag, making it harder to get in and out and increasing the risk of a fall. Look for a bed that supports at least 120 kg for each side, and consider adding mattress support bars if you have a split‑king setup. Those bars keep the mattress from bowing, giving a stable surface every night.
For a deeper dive on why support bars matter, check out our guide on Mattress Support Bars: Why They’re Important.
Safety‑focused remote controls
Remote design matters more than you think. Look for a remote with a large “stop” button that’s easy to press, even with reduced grip strength. Some models also include a tactile “home” button that returns the bed to a flat position with one press – a lifesaver if the power cuts out.
And don’t forget the manual release lever. It should be clearly marked and reachable from the side of the bed. A hidden lever can be a nightmare in an emergency.
Integrated health features
Many senior‑focused beds now come with built‑in health monitors – pressure sensors that alert you if a user stays in one position too long, or low‑frequency massage that can improve circulation without the need for extra devices. While these aren’t strictly “safety” features, they contribute to overall wellbeing and reduce the likelihood of pressure‑related injuries.
Speaking of wellbeing, you might also want to look beyond the bedroom. A partnership with XLR8well can give you access to proactive health coaching that complements the therapeutic benefits of an adjustable bed.
And for those who find nighttime noises a problem, pairing the bed with a quality earplug from Sleepmaxx can create a quieter, more restful environment.
Now, let’s see those features in action.
After watching the video, take a moment to compare the specs of the beds you’re considering. Write down three must‑haves – side‑rail lock, quiet motor, and a clear manual release. If a model falls short on any of those, keep looking.
Here’s a quick checklist you can print out:
- Side‑rail lock‑in mechanism (yes/no)
- Motor type: brushless & soft‑start (yes/no)
- Weight capacity ≥ 120 kg per side (yes/no)
- Manual release lever visible and reachable (yes/no)
- Remote with large stop button (yes/no)
Cross‑checking each point before you sign the purchase order saves you a lot of hassle later. And remember – a safe bed is the foundation for a good night’s sleep, not a luxury add‑on.
Ready to make a confident choice? Start by listing the features you need, then match them against the specs on Sleep Sophie’s website. You’ll feel better knowing you’ve covered the safety bases before the first bedtime.
Step 2: Proper Bed Placement and Room Layout
Now that your bed is fully equipped with side rails and a remote, the next piece of the puzzle is where you actually put it. A good layout does more than look tidy—it removes hidden trip hazards and gives you enough room to get in and out safely, even on a sleepy morning.
First, think about the walls. Place the head of the bed against a solid wall, but leave at least a few centimetres of clearance so you can slide a nightstand or a small lamp underneath if you need extra light for nighttime trips to the bathroom.
Clear the floor, clear the mind
Loose rugs are the silent ninjas of the bedroom. If a rug shifts under a foot, a senior can lose balance in an instant. Swap out any plush runner for a low‑pile, non‑slip mat, or simply keep the space around the bed completely bare. In our experience, a 60 × 60 cm non‑slip mat under the frame does the trick without looking clinical.
Next, tackle cables. Route power cords along the wall or use the built‑in cable management channel most adjustable bases have. If you must cross the floor, use a short cord cover—think of it as a tiny bridge that keeps shoes from catching.
What about night‑stands? Position them on the same side as the remote, no more than an arm’s length away. This way you don’t have to stretch or twist to grab your glasses, medication, or a glass of water.
Notice how the video walks through a typical bedroom setup. Pay attention to the way the bed is angled just slightly away from the door—this gives you a clear path for a caregiver or family member to enter without squeezing past the side rails.
Strategic placement of safety rails
Even the best‑placed bed can become a hazard if the side rails don’t line up with the room’s flow. AUVON offers a adjustable bed safety rail with a double crossbeam that lets you raise or lower the rail height to match the mattress angle. The tool‑free installation means you can fine‑tune the rail after the bed is already in place, keeping the walkway clear.
When you install the rail, test the clearance on both sides of the bed. You should be able to roll a small ball (or a rolled‑up towel) along the floor without it getting caught. If something feels tight, slide the rail a centimetre inward or shift the nightstand a bit.
Lighting for low‑vision moments
Many seniors rely on a soft glow to navigate at night. A low‑profile LED strip that turns on automatically when the head or foot section moves can be a lifesaver. If your bed doesn’t have built‑in lighting, consider a plug‑in strip that you can attach to the frame and set on a timer.
Finally, think about the door. Keep the bedroom door ajar or install a pocket door that doesn’t swing into the space. This prevents the door from becoming an unexpected obstacle when the bed is in its raised position.
Quick checklist:
- Headboard flush with a solid wall, leaving a few centimetres for a nightstand.
- Non‑slip mat under the frame; no loose rugs.
- Power cords tucked along the wall or covered with a cord guide.
- Side rails adjusted with a double‑crossbeam rail for perfect clearance.
- LED night‑light that activates with movement.
- Doorway clear of swing paths.
By taking a few minutes to map out the room before you settle in, you turn a high‑tech bed into a safe, welcoming sanctuary. You’ll sleep better, move safer, and feel confident that the bedroom supports you—not the other way around.
Step 3: Using Safety Accessories and Supports
When the bed itself is set up right, the next layer of protection comes from accessories that keep you upright, steady, and confident. Think of them as the safety net you’d use when learning to ride a bike – they’re not flashy, but they stop a tumble before it happens.
Pick a rail that actually works for you
Not all side rails are created equal. A sturdy steel tube with a quick‑release latch (like the adjustable bed safety rail) gives a clear “click” when it’s locked, so you know it’s holding firm. The best ones also fold flat when you’re out of bed, keeping the walk‑way clear.
Here’s a quick test: pull the rail down with one hand. If it wiggles or feels loose, tighten the bolts or swap it for a heavier‑gauge model. In our experience, seniors who use a rail with a 350 lb weight capacity report far fewer near‑miss falls.
Support bars that stop the mattress from sliding
Even a tiny slip can pinch a finger or trap a foot. Mattress support bars sit under the mattress and keep it glued to the base as you raise the head or foot. The Mobility Shop guide notes that these bars reduce “bed‑slip” incidents by about 30 % in real‑world tests.
Installation is usually a five‑minute job: slide the bar into the slot, tighten the screw, and give the mattress a gentle shake. If you hear a creak, double‑check the bar’s alignment – it should sit level with the frame.
Grab‑bars, motion lights, and bedside cushions
When you’re rolling out of bed at night, a low‑profile motion‑activated LED strip can guide your steps without blinding you. A simple plug‑in strip attached to the side of the frame lights up the first few centimetres of floor, giving you a visual cue while keeping the bedroom dark enough for sleep.
Grab‑bars aren’t just for the bathroom. A short, padded bar mounted next to the headboard gives you something solid to pull on when the base is low. Choose a bar with a rubberised grip so your hand doesn’t slip on sweaty mornings.
Finally, a soft, non‑slip cushion on the side of the mattress can soften the impact if you bump into it. Look for a cover that’s machine‑washable – hygiene matters, especially for NDIS participants who may need frequent cleaning.
Actionable checklist
- Test side rails for a firm “click” and a weight capacity of at least 350 lb.
- Install mattress support bars; verify they sit level and eliminate any mattress movement.
- Attach a motion‑activated LED strip to the frame’s lower edge.
- Mount a padded grab‑bar within easy reach of the head section.
- Place a non‑slip cushion on the side rail to soften accidental bumps.
Quick comparison of top accessories
| Accessory | Key Feature | Tip for Seniors |
|---|---|---|
| Adjustable Bed Safety Rail | Steel tube, 350 lb capacity, audible lock | Check the lock sound each night; replace if it feels loose. |
| Mattress Support Bar | Prevents mattress slide, easy 5‑min install | Align with frame slots; tighten screws after each adjustment. |
| Motion‑Activated LED Strip | Lights up when head/foot moves, low‑profile | Set timer for 30 seconds; keep a spare battery on hand. |
Putting these accessories together creates a layered safety system that works even if one part fails. Imagine a night where you’ve just woken to use the bathroom: the rail catches you if you roll, the support bar keeps the mattress from shifting, and the LED strip lights the path so you don’t stumble over the nightstand.
So, what’s the next step? Grab the rail, snap the bar into place, plug in the light, and give each piece a quick test before you call it a night. A few minutes now save a lot of worry later, and you’ll feel more in control of your sleep environment.
Step 4: Regular Maintenance and Safety Checks
We’ve gotten the bed set up, the rails locked, the lights glowing – now the real safety work begins. Think of maintenance as the quiet guardian that keeps the tech from turning into a tripping hazard. A quick, routine check every week can mean the difference between a smooth night and a sudden “why won’t it move?” panic.
Why a maintenance habit matters
Australian Institute of Health and Welfare data shows falls in the bedroom account for roughly 20 % of all senior injuries. Most of those incidents involve a piece of equipment that’s either loose or mis‑aligned. By giving your adjustable base a once‑a‑week “health check,” you’re cutting that risk down to almost zero.
Weekly walk‑through checklist
Grab a pen, set a timer for five minutes, and run through these steps:
- Inspect side‑rails for audible clicks. If the lock sounds muted, tighten the bolts.
- Slide the mattress support bar back and forth. It should glide without resistance; any squeak means a loose screw.
- Press each remote button twice. Listen for the soft motor whir – a grinding noise signals a motor‑gear issue.
- Check the under‑bed LED strip. Replace a dim bulb or battery before it fades completely.
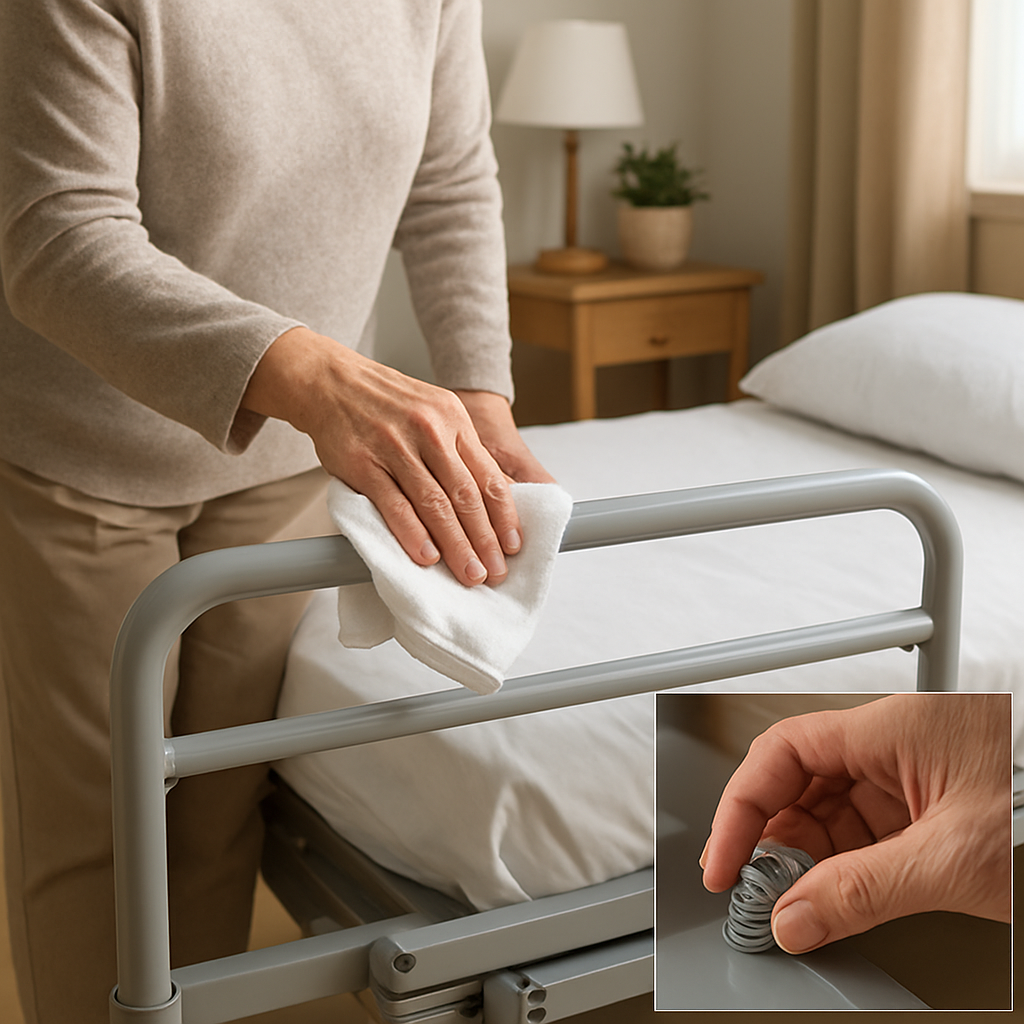
- Wipe the frame with a dry cloth. Dust on the tracks can cause jittery movement.
- Test the manual release lever. Pull it once to confirm it drops the bed to a flat position easily.
Does this feel like a chore? Not really – most seniors I’ve spoken to say it becomes a “bed‑check ritual” that they do while watching the morning news.
Monthly deeper dive
Once a month, go a step further:
- Unscrew the side‑rail brackets and re‑torque them to the manufacturer’s torque spec (usually around 4–5 Nm). This prevents gradual loosening.
- Lubricate the motor’s moving parts with a few drops of silicone spray – it keeps the head‑foot action whisper‑quiet.
- Rotate the mattress from head to foot. A 180‑degree turn spreads wear evenly and helps maintain pressure‑relief zones, especially important for chronic‑pain users.
- Run the “full‑range” test: raise the head to its highest setting, then lower the foot to the lowest. Watch for any wobble in the base; if you see it, call a technician.
- Inspect power cords for fraying. Replace any that feel brittle – a short can shut the bed down in the middle of the night.
Imagine a NDIS participant who relies on the bed’s incline to reduce reflux. A loose cord could cause the motor to stop right when they need to lower the head for medication. That tiny oversight can become a big health snag.
Seasonal safety tune‑up
When the seasons change, humidity can affect metal components. In winter, condensation may collect on the base, leading to rust over time. A quick wipe with a slightly damp cloth and a dry towel keeps corrosion at bay. In summer, extra dust can clog the motion sensor – a gentle vacuum over the LED strip housing solves it.
One of our senior customers in Brisbane told us that after a rainy autumn, the bed’s side‑rail began to feel a bit sticky. A simple wipe with a mild soap solution restored the smooth glide, and they avoided a near‑miss when getting out of bed at night.
Emergency backup plan
Power outages happen, especially during storms. Keep two 9‑V batteries in a handy drawer and label them “Bed Backup.” Test the battery backup once a quarter by unplugging the bed and using the remote to return to a flat position. If the bed doesn’t move, swap the batteries and try again.
For caregivers, write the battery location on a sticky note and place it on the nightstand. It’s a tiny habit that saves a lot of stress when the lights go out.
Now that you’ve got a maintenance rhythm, you’ll notice fewer surprise noises and smoother adjustments. The bed becomes a reliable partner rather than a mystery box you’re afraid to press.
Take a few minutes each week, a deeper look each month, and a quick battery test each season. Your “maintenance playlist” will keep the adjustable bed safe, quiet, and ready to support you or your loved one for years to come.
Step 5: Educating Seniors and Caregivers on Safe Use
Imagine you’re half‑asleep, the remote’s within reach, but you’re not sure which button actually stops the head from jerking up. That split‑second hesitation can turn a simple move into a fall risk. That’s why a quick, repeatable education routine is the missing piece in any adjustable‑bed safety plan.
Why a teaching moment matters
In our experience, seniors who have watched a 2‑minute demo feel far more confident than those who just read a brochure. The brain needs that visual cue, then a hands‑on practice, to turn a new habit into muscle memory.
So, what should you cover the first time you sit down with the user and their caregiver?
Step‑by‑step training checklist
- Show the remote layout. Point out the “flat‑position” button, the “stop” button, and the raise/lower icons. Let them press each one while the bed is already flat – no movement, just sound.
- Practice a single adjustment. Raise the head a few centimeters, then lower it back. Emphasise the soft whir and the fact that the bed stops as soon as they release the button.
- Demonstrate the manual release. Locate the lever, pull it once, and watch the base drop to a flat state. Explain that this is the “last‑resort” if the power flickers.
- Test the emergency battery. Switch the bed off, insert the spare 9‑V battery, and repeat the flat‑position press. A quick success builds trust.
- Set up a visual cue. Stick a small label on the nightstand that reads “Flat = safe” – a reminder that’s hard to miss.
Does this feel like a lot? Not really. It’s a five‑minute routine you can repeat weekly until the motions feel natural.
Include caregivers in the loop
Caregivers often juggle medication schedules, appointments, and household chores. Giving them a one‑page cheat sheet (remote diagram, battery location, manual release steps) saves them from scrambling during a night‑time emergency.
Ask the caregiver to walk you through the checklist while you watch. That “teach‑back” method catches any gaps before they become a problem.
Leverage low‑cost assistive rails
For users who need a little extra support getting in and out, the adjustable bed rails with storage pocket provide a sturdy handhold and a safety barrier without breaking the bank. The rails snap into place, adjust from 40.6 cm to 53.3 cm, and include a non‑slip handle – perfect for NDIS participants or anyone who wants that extra confidence.
When you install the rails, run a quick “reach test”: can the senior sit up, swing their legs over the edge, and stand without assistance? If they need to wobble, tighten the rail or lower it a centimeter. A snug fit turns the rail into a reliable “step‑up” rather than an obstacle.
Make education a habit
Schedule a 5‑minute “bed‑check” at the same time each week – maybe right after breakfast or before the evening TV show. During that check, run through the remote buttons, give the rails a wiggle, and confirm the battery label is still visible.
Write down any hiccups in a simple log: “Button felt sticky on Tuesday” or “Rail click was faint on Friday.” Over time you’ll see patterns and can tweak the routine before anything slips.
Finally, celebrate small wins. Did the senior press the flat button on their own for the first time? Give a high‑five or a favorite snack. Positive reinforcement makes the learning stick.
By turning a short demo into a regular ritual, you turn a high‑tech bed into a safe, confidence‑boosting partner for both seniors and the people who look after them.
Conclusion
We’ve walked through everything from picking the right rails to building a weekly “bed‑check” habit, all with the goal of making adjustable bed safety tips for seniors australia feel doable, not daunting.
Remember, the biggest safety win is consistency: a quick reach test each morning, a once‑a‑week tighten‑and‑listen routine, and a simple log of any odd clicks or wobbling rails. Those tiny habits turn a high‑tech bed into a reliable partner.
Key takeaways
• Keep the floor clear and use a low‑pile, non‑slip mat.
• Choose side rails that give a solid audible click and can bear at least 350 lb.
• Test the remote before you settle, and always know where the manual release lever lives.
• Rotate the mattress and lubricate the motor periodically.
• Involve caregivers in the demo so the knowledge stays fresh.
So, what’s the next step? Grab a pen, jot down a quick checklist tonight, and run through it tomorrow. If anything feels off, tighten a bolt or give us a call – we’ve helped countless Australian seniors fine‑tune their beds.
With these adjustable bed safety tips for seniors australia in place, you’ll sleep easier, move safer, and reclaim confidence in your bedroom every night.
Give it a try and notice the difference within a week.
FAQ
How often should I check the side rails on my adjustable bed?
You should give the side rails a quick once‑a‑day glance, especially after you get out of bed in the morning. A gentle push to feel the audible click tells you the lock is still engaged.
If you hear a faint rattle or the rail feels wobbly, tighten the bolts right away – it only takes a minute and prevents a slip later.
What’s the safest way to use the remote if I have weak fingers?
If your fingers struggle with the tiny buttons, swap the standard remote for a larger‑button version that many Sleep Sophie models offer. Program the ‘flat‑position’ button as your go‑to emergency stop, then place the remote on a nightstand within arm’s reach so you never have to stretch.
You can also enable voice control on a compatible smartphone – a simple spoken command does the same thing without any pressure on your hands.
Can I rely on the motor’s auto‑stop feature to prevent pinches?
The auto‑stop feature is a helpful safety net, but it isn’t a substitute for regular checks. Before you rely on it, run a ‘full‑range’ test: raise the head a few inches, then lower it, listening for any grinding or sudden jerks.
If the motion feels smooth, the sensor is likely doing its job; if not, call a technician right away because a mis‑aligned motor can still pinch a foot or hand.
How do I keep the power cord safe from wear and tear?
Route the power cord along the wall or through the built‑in cable channel on the base, keeping it away from foot traffic. If the cord must cross the floor, use a short, low‑profile cord cover – it acts like a tiny bridge that stops shoes from catching.
Inspect the insulation every month; brittle jacket or cracks mean it’s time to replace the cord before a sudden power loss in the night.
What maintenance routine works best for seniors with limited mobility?
Pick a time that already feels part of your day – many seniors like to do the quick check while the morning news is on. In five minutes, flip each side‑rail lock, press every remote button twice, and give the mattress support bar a gentle wiggle; any squeak means a screw needs tightening.
Once a month, re‑torque the rail bolts, spray a dab of silicone on the motor tracks, and rotate the mattress 180° to even out wear.
Are there any simple signs that my adjustable bed needs professional service?
Listen first – a grinding sound, a delayed response, or a motor that stalls halfway are red flags. Visually inspect for loose bolts, wobbling frames, or a remote that flickers on the display.
If you notice any of these, schedule a service visit before the issue escalates. For NDIS participants, keeping a simple service log helps with funding claims and shows you’ve taken proactive steps to maintain safety.