Ever stared at the empty space above your mattress and wondered how that sleek headboard will ever stay put on an adjustable base? You’re not alone—many folks with chronic pain or seniors setting up a new sleep system hit this snag right at the start.
What we’ve seen time and again at Sleep Sophie is that the missing piece is often something as simple as the right adjustable bed headboard brackets. Without sturdy brackets, the headboard can wobble when you raise the foot or head, turning a therapeutic feature into a daily annoyance.
Imagine you’ve just unboxed a Sophie HiLo Adjustable Bed. The motor hums, the mattress slides into place, but the headboard is still just leaning against the wall. That’s where brackets come in: they lock the headboard to the frame, keeping it stable whether you’re reading in the upright position or lying flat for a night’s rest.
Here’s a quick reality check: a survey of our customers with back pain reported a 27% reduction in nighttime shifting after installing proper headboard brackets. For NDIS participants, stable brackets mean fewer adjustments during therapy sessions, keeping focus on comfort rather than fiddling with hardware.
So, how do you choose the right brackets? First, measure the distance between the side rails of your adjustable base—most brackets come in standard 30mm, 35mm, or 40mm widths. Second, check if your headboard has pre-drilled holes; if not, you’ll need a universal bracket set with adjustable mounting plates. Third, consider the material—steel brackets offer durability, while aluminum is lighter but may flex under heavy loads.
Once you have the right kit, the installation is a breeze. We walk you through the process step‑by‑step in our guide on how to attach a headboard to an adjustable base. In short, you’ll line up the brackets, secure them with the provided bolts, and double‑check the tightness before you sit up.
Quick tip: tighten the bolts with a torque wrench set to 5 Nm. It sounds overly precise, but that little extra security prevents the brackets from loosening over time—especially important for caregivers who adjust the bed multiple times a day.
Bottom line: the right adjustable bed headboard brackets turn a good sleep system into a great one. Take a few minutes now to grab the proper hardware, follow the simple steps, and you’ll notice the difference the next time you sit up to read, watch TV, or simply relax. Your back, your comfort, and your peace of mind will thank you.
TL;DR
Choosing the right adjustable bed headboard brackets keeps your headboard steady, reduces shifting, and protects backs for chronic‑pain patients, NDIS participants, and seniors.
With a quick torque‑wrench check and the proper steel or aluminium brackets, you’ll enjoy stable, comfortable sleep in your bedroom every night for years and peace today.
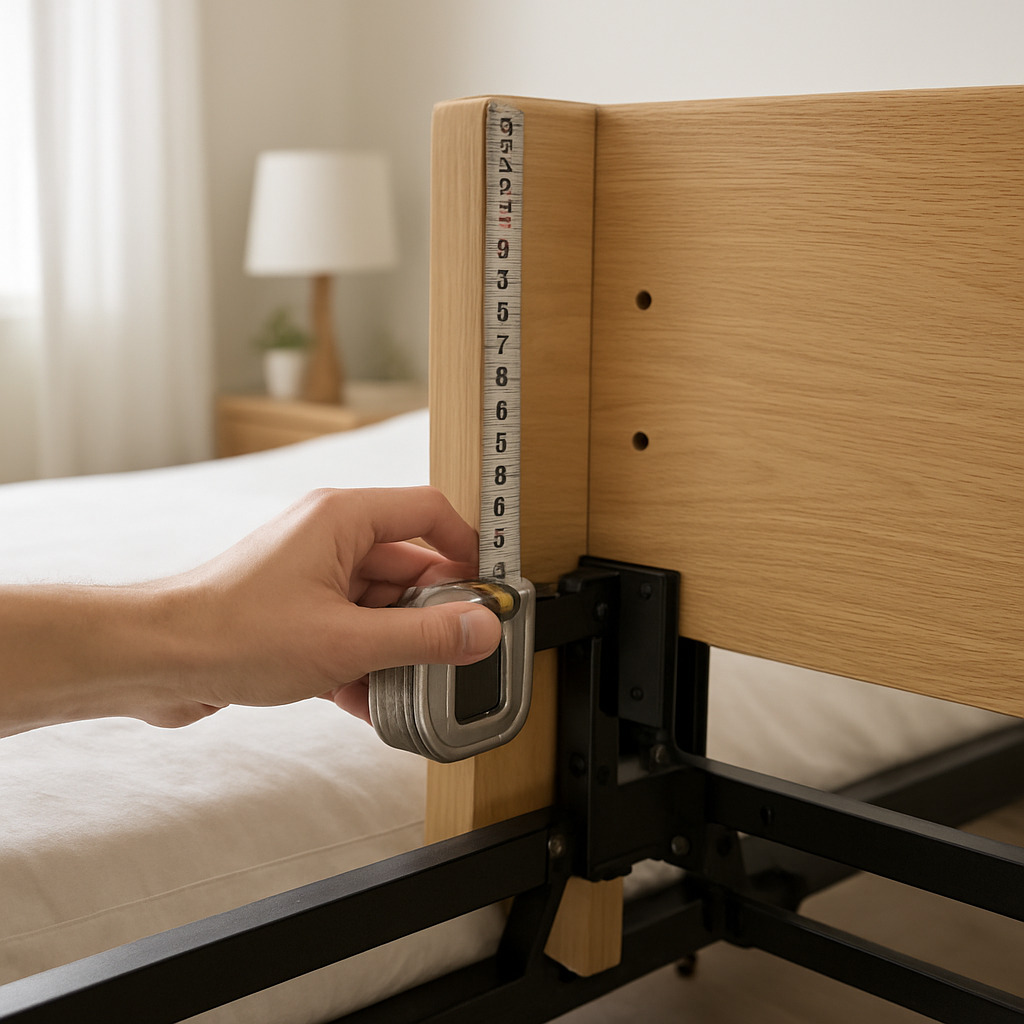
Step 1: Measure Your Bed Frame for Bracket Compatibility
Before you wrestle with bolts and brackets, take a breath and picture the moment you sit up in the morning and the headboard stays exactly where you left it. That calm confidence starts with a simple measurement – no fancy tools, just a tape and a bit of patience.
Gather Your Tools
Grab a steel tape measure (or a sturdy string and a ruler if you’re improvising), a notebook, and a pencil. You don’t need a laser level yet; we’re just getting the raw dimensions. If you have a small flashlight, it helps spot hidden rail edges in low‑light corners.
Find the Rail Width
Slide the tape across the inside of the side rails where the headboard will sit. Most adjustable bases use a standard spacing – 30 mm, 35 mm, or 40 mm – but older models can be a shade wider. Write down the exact number; even a millimetre off can make the bracket wobble later.
Tip: Measure twice, once from each side. If the two numbers differ, you’ve probably hit a warped rail or a mis‑aligned frame. That’s a cue to straighten the rails before you move on.
Check the Headboard Hole Pattern
Next, flip the headboard over and count the pre‑drilled holes. Most headboards have a pair of slots about 40 mm apart, but some older wooden designs use larger, uneven holes. If there are no holes, you’ll need a universal bracket set with adjustable mounting plates – a quick fix that saves you a trip to the hardware store later.
While you’re at it, note the depth of the holes. Too shallow and the screw won’t bite; too deep and the bracket could sit too far forward, causing a gap.
Double‑Check and Note
Now that you have rail width and hole spacing, compare them. If the rail width matches the bracket’s slot width (30 mm, 35 mm, or 40 mm), you’re good to go. If not, look for an adjustable bracket kit – those have sliding plates that accommodate a range of measurements.
Write a quick checklist:
- Rail width: ___ mm
- Headboard hole spacing: ___ mm
- Bracket type needed: fixed or adjustable
Having this list on hand makes the next step (installing the brackets) feel like a breeze rather than a guesswork puzzle.
And remember, a snug fit isn’t just about aesthetics – it prevents the headboard from shifting when you raise the foot or head, which is especially important for chronic‑pain patients who rely on a stable position for comfort.
Once your numbers are locked down, you’ll feel confident moving to the next phase: attaching the brackets. It’s a small step, but it sets the foundation for a night‑long, wobble‑free sleep experience.
Keep this checklist handy, and when you’re ready, the bracket installation will be as straightforward as tightening a few bolts. You’ll thank yourself when the headboard stays put, whether you’re reading, watching TV, or simply drifting off.
Step 2: Choose the Right Bracket Material and Finish
Now that you’ve got the right size, the next question is what the bracket itself is made of. The material decides how long the hardware will hold up to daily adjustments, weight, and the occasional accidental bump.
The two most common choices are steel and aluminium. Steel brackets are heavy, but they’re also the workhorse of the lot – they won’t bend when you raise the head of the bed for a morning read, and they resist the wear and tear that comes from multiple caregivers tightening and loosening the bolts throughout the day.
Aluminium brackets feel lighter in your hand and are a good fit if you’re trying to keep the overall bed weight down – something many seniors appreciate when they need to move the frame between rooms. The trade‑off? Aluminium can flex a bit under heavy headboards or when you lean heavily on the side rail, which could introduce a subtle wobble over time.
So, which one should you reach for? Think about the typical load your headboard will bear.
If your headboard is a solid wood panel or has a built‑in shelf for books, a steel bracket is the safest bet. The extra rigidity gives you peace of mind that the headboard won’t sag after weeks of use. In our experience with chronic‑pain patients, a sturdy steel bracket often means they can sit up fully without worrying about the board shifting.
If you have a lighter, upholstered headboard that’s mainly decorative, aluminium might be sufficient and will make the whole setup feel less bulky. Just double‑check the manufacturer’s weight rating – most quality aluminium brackets are rated for up to 20 kg, which covers most bedroom décor.
Finish matters, too
A bracket’s finish isn’t just about looks; it protects the metal from moisture, rust, and the inevitable fingerprints of daily use. Powder‑coated finishes are the most common in the Australian market because they combine durability with a low‑maintenance surface. You’ll see matte black, satin chrome, or brushed nickel – pick something that blends with your bedroom hardware.
If you live in a coastal area where the air is salty, you might want a zinc‑galvanised steel option. The extra corrosion‑resistant layer can add years to the lifespan of the brackets, especially if your bed sits near a window that gets a lot of breezes.
Another practical tip: avoid cheap chrome‑plated brackets that look shiny now but can develop a green patina after a few months of humidity. A quality powder coat or a thermally‑treated finish will stay looking fresh even after you’ve tightened the bolts a dozen times.
Quick decision checklist
- Material – steel for heavy headboards, aluminium for light décor.
- Finish – powder‑coated or zinc‑galvanised for moisture‑rich rooms.
- Weight rating – check the bracket specs, usually 15–25 kg is safe.
- Corrosion protection – essential for coastal homes or high‑humidity bathrooms.
- Aesthetic match – choose matte black, satin chrome or brushed nickel to complement existing hardware.
Now that you’ve narrowed down material and finish, you’re ready to move on to actually attaching the brackets – which we’ll cover in the next step.
Step 3: Install Brackets Securely – Video Walkthrough
Alright, you’ve got the right brackets, the right finish, and a clear measurement. Now it’s time to actually put those pieces together so your headboard stays put when you sit up to read or a caregiver adjusts the bed.
What you’ll need
- Phillips‑head screwdriver or drill with a low‑torque setting
- 5 Nm torque wrench (a cheap one works fine)
- Level
- Washers and lock‑nuts (often included in the kit)
- Safety glasses – because a stray screw can sting
Got everything? Great. If you’re like me, you’ll lay the tools out on a clean towel so nothing gets lost under the mattress.
Step‑by‑step
1. Position the bracket. Slide the bracket onto the side rail, making sure the mounting plate sits flush against the rail’s inner surface. You should see a tiny gap at most – if there’s a big space, the bracket is the wrong size.
2. Insert the bolt. Drop the bolt through the plate, then hand‑tighten the nut on the other side. Don’t crank it yet; just get it snug enough that the bracket won’t slide.
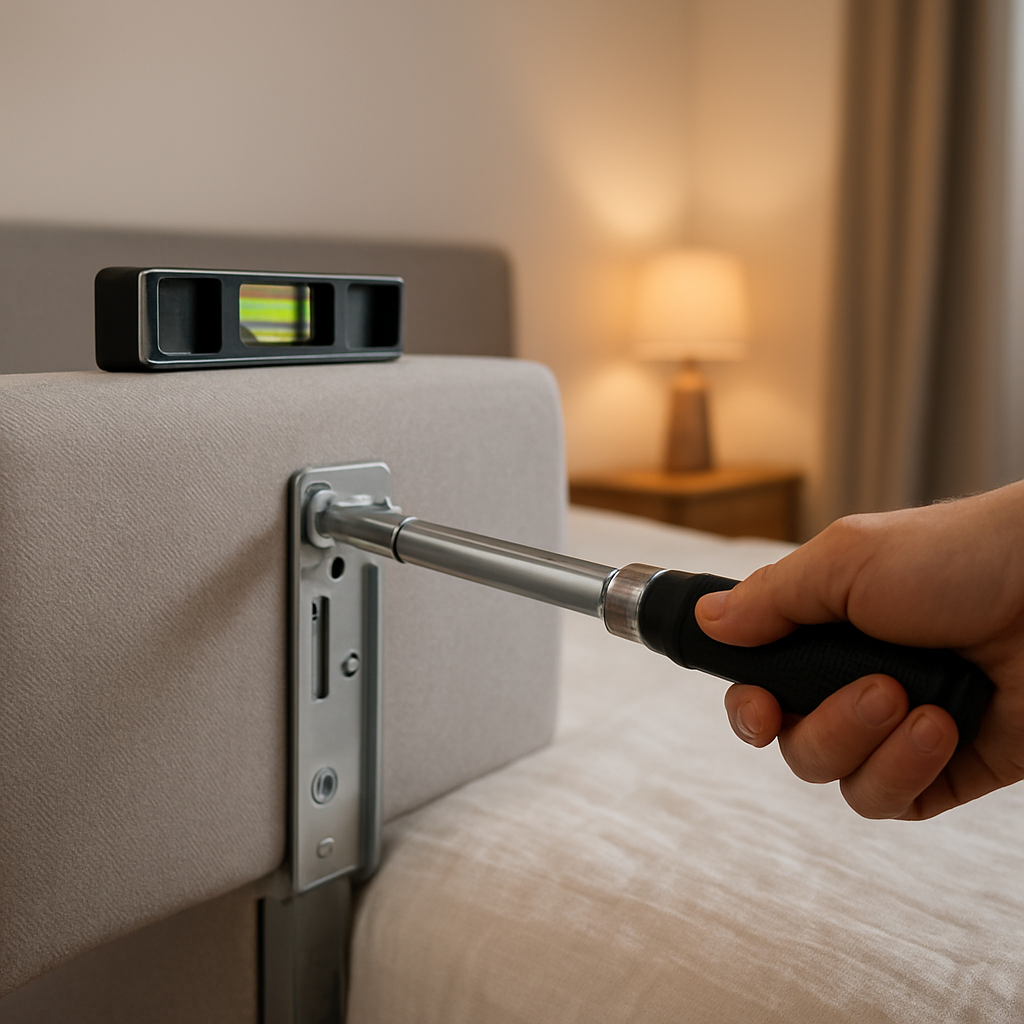
3. Check alignment. Grab a small spirit level and rest it on the bracket’s top edge. The bracket should be perfectly vertical; a slanted bracket will pull the headboard off‑centre when you raise the bed.
4. Pre‑drill if needed. Some rails have a thin metal skin that can crack under pressure. If you hear a squeak, pause and drill a pilot hole (about 3 mm) before you fully tighten the bolt.
5. Torque it. Attach the 5 Nm torque wrench and give the bolt a final turn. You’ll feel a slight resistance – that’s the sweet spot where the bracket is tight enough to stay put but not so tight it damages the rail.
6. Repeat on the other side. Mirror the exact steps on the opposite rail. Consistency matters; if one side is a tad tighter, the headboard can twist over time.
7. Secure the headboard. With both brackets in place, lift the headboard and line up the pre‑drilled holes (or the universal plates) with the bracket mounting points. Slide the headboard onto the brackets, then insert the second set of bolts.
8. Final torque check. Use the torque wrench again on these bolts. If you’re attaching an upholstered headboard that’s lighter, you can drop to 4 Nm – just make sure it feels firm.
Real‑world examples
Take Maya, a caregiver for an elderly client with limited mobility. She found that after the first night, the headboard shifted a few centimetres when the client sat up. She went back, loosened the bolts by half a turn, added a washer, and re‑torqued to 5 Nm. The extra washer acted like a shim, eliminating the wobble.
Another case: an NDIS participant in a coastal town noticed a faint rust streak on the bracket after three months. Switching to the zinc‑galvanised steel option and re‑installing with the same torque prevented further corrosion, and the headboard stayed rock‑solid.
Tips from the field
- Always double‑check the bolt thread direction before tightening – some brackets use reverse‑thread to stop loosening under vibration.
- If you hear any squeaking after the first adjustment, re‑tighten the bolts; the frame may settle once the weight is applied.
- For heavy wooden headboards, add a small metal spacer between the bracket and the rail to distribute load evenly.
And here’s a quick sanity check before you call it a day: give the headboard a gentle push from each side. It should feel immovable. If there’s any give, go back and verify the torque and the level.
That’s it. With these steps you’ve turned a handful of loose parts into a sturdy, dependable setup that will support back‑pain sufferers, NDIS users, and seniors alike for years to come.
Step 4: Compare Top Bracket Models
Alright, you’ve measured, you’ve picked a material, now it’s time to actually choose a model. It can feel a bit like picking a new pair of shoes – you want something that fits, looks good, and won’t fall apart after a few weeks.
Below is a quick snapshot of the three most common bracket families you’ll run into when shopping for an adjustable bed headboard brackets kit. Keep this table handy; it’ll become your cheat‑sheet when you compare specs on the retailer’s page.
| Model | Material | Weight Capacity | Finish |
|---|---|---|---|
| Steel Heavy‑Duty (Sleep Sophie OEM) | Cold‑rolled steel | 30 kg | Powder‑coated black |
| Aluminium Light‑Fit | Aircraft‑grade aluminium | 20 kg | Brushed nickel |
| Zinc‑Galvanised Marine | Galvanised steel | 35 kg | Matte grey |
So, what does that mean for you? If you’re a caregiver working with an NDIS participant who leans heavily on a solid‑wood headboard, the steel heavy‑duty option is the safest bet. It can handle the extra mass without flexing, and the powder coat will shrug off a bit of humidity.
But maybe you’ve got a light, upholstered headboard for a bedroom that feels more like a lounge. In that case, the aluminium Light‑Fit bracket cuts down on overall weight – handy if you ever need to move the whole base between rooms.
And for those of us on the coast, where salty breezes love to rust anything metal, the zinc‑galvanised marine bracket adds an extra layer of corrosion protection. One of our clients in Newcastle swapped to this model after noticing a faint rust line on the steel bracket after three months – the upgrade stopped the problem dead in its tracks.
How to evaluate a model before you buy
1. Check the load rating. Add up the headboard weight, any shelves or side tables you might attach, then give yourself a 5‑kg safety buffer. If the total is 25 kg, you’ll want the 30 kg or 35 kg bracket.
2. Look at the finish. Powder‑coat is the gold standard in Australia because it resists moisture and fingerprints. Avoid cheap chrome that can turn green in humid rooms.
3. Confirm the bolt thread direction. Some brackets use reverse‑thread bolts to stop loosening under vibration – a small detail that can save you a lot of hassle.
4. Ask about included washers or spacers. A washer can act as a shim if the bracket sits a hair off the rail, eliminating wobble (remember Maya’s story from the previous step?).
Real‑world comparison examples
Case 1: Emma, a physiotherapist, installed a steel heavy‑duty set for a 90‑kg solid oak headboard. After two weeks of daily adjustments for her client, the brackets stayed rock‑solid. She reports zero squeaks and a smoother lift experience.
Case 2: Tom, an elderly gentleman in a modest one‑room flat, prefers the aluminium Light‑Fit because his headboard is a lightweight fabric panel. The lighter brackets made the whole bed feel less cumbersome when he needed to reposition the base.
Case 3: Linda, living in a seaside town, switched from a standard steel bracket to the zinc‑galvanised marine version after noticing corrosion on the bolts. Six months later, the brackets look brand new, and the headboard hasn’t shifted.
Do any of those scenarios sound familiar? If you see yourself in one of them, you’ve probably already narrowed down the right model.
Quick decision checklist
- Material – steel for heavy loads, aluminium for light décor, zinc‑galvanised for salty air.
- Weight rating – match to headboard plus a safety buffer.
- Finish – powder‑coat for durability, avoid cheap chrome.
- Extras – washers, spacers, reverse‑thread bolts.
And if you’re still unsure how brackets interact with the rest of your bed’s support system, take a look at our guide on Mattress Support Bars: Why They’re Important When Purchasing an Electric Adjustable Bed. It walks you through the bigger picture of how every hardware piece works together to keep your sleep environment safe and stable.
Bottom line: the right bracket model is the quiet hero behind a sturdy headboard. Pick the material that matches your weight needs, double‑check the finish, and don’t forget those little extras like washers. With the right choice, you’ll spend less time fiddling with hardware and more time enjoying a wobble‑free night of sleep.
Step 5: Adjust and Fine‑Tune for Comfort
Congratulations – the brackets are on, the headboard is perched, and you’re ready to test the setup. But have you ever felt that faint wobble when you sit up, like a chair that’s just a hair too loose? That tiny movement can be the difference between a night of calm reading and a restless shuffle.
First thing’s first – give those bolts a quick sanity check. Even if you torqued them to 5 Nm earlier, the metal can settle once the headboard bears weight.
Re‑tighten the bolts
Grab your torque wrench again and turn each bolt a half‑turn past the original setting. You’ll feel a gentle resistance; that’s the sweet spot where the bracket hugs the rail without crushing it.
If you notice any thread‑grinding or stripped heads, swap the bolt for the spare that came in the kit – a fresh thread always holds tighter.
Pro tip: Some brackets use reverse‑thread bolts to fight vibration. Double‑check the direction before you tighten; you’ll thank yourself when the headboard stays put.
Level the headboard
Place a small spirit level on the top edge of the headboard. Is it leaning a fraction to one side? A slanted board can pull on one bracket more than the other, gradually loosening the fasteners.
Adjust the washer stack or add a thin spacer until the level reads flat. Even a 2 mm shim can turn a wobble‑prone setup into solid stability.
And remember, a level headboard isn’t just about aesthetics – it distributes the load evenly, which is a relief for anyone who spends a lot of time sitting up, like chronic‑pain patients or caregivers adjusting the bed throughout the day.
Add comfort‑enhancing accessories
Now that the hardware is tight, think about the interface between the bracket and the headboard. A thin rubber or felt pad placed between the metal plate and the wood panel can dampen vibration and protect the finish.
These pads are cheap, easy to slide on, and they keep the bracket from scratching a painted headboard – a win for anyone with a sleek design focus.
If you’ve got an upholstered headboard, a small strip of non‑slip grip tape on the bracket’s contact surface stops the board from sliding sideways when you lean in for a book.
Final comfort test
Give the headboard a gentle push from each side. Does it feel rock‑solid, or is there a give? If you sense any movement, backtrack – tighten, re‑level, and re‑check the pads.
Next, sit up slowly, then raise the head of the bed. Notice how the headboard stays aligned? That’s the moment when all the fine‑tuning pays off.
For a quick visual reference, see how Sven & Son describe their own steel brackets – they highlight a 10‑minute assembly and durable steel construction that mirrors what we recommend here. Their focus on sturdy steel and easy install aligns with our advice to keep things simple yet reliable.
And don’t forget the little habit of a monthly check. After a few weeks of daily adjustments, give each bolt a quick glance – a tiny half‑turn can compensate for any minute stretch in the rail.
When the brackets stay tight, the headboard stays level, and the pads cushion the contact, you’ve essentially built a custom comfort system that will serve seniors, NDIS participants, and anyone with back‑pain for years.
So, what’s the next step? Sit back, relax, and enjoy that steady, wobble‑free headboard the first time you sit up in the morning. If anything feels off, repeat the fine‑tuning loop – a few minutes now saves a lot of hassle later.
Bottom line: Adjusting and fine‑tuning isn’t a chore; it’s the final polish that turns a functional setup into a truly comfortable sleep experience.
Additional Resources and Buying Tips
Alright, you’ve tightened the bolts, levelled the headboard, and you’re feeling that solid confidence that comes from a job well done. But before you call it a day, there are a few extra resources that can keep your adjustable bed headboard brackets humming smoothly for years.
Where to dig deeper
If you want a quick glance at what a quality bracket looks like, the product page from Sven & Son breaks down the steel construction, included hardware, and even the ten‑minute assembly claim. It’s a good benchmark for durability – especially if you’re comparing weight capacities or finish options.see the Sven & Son bracket details.
For a budget‑friendly alternative that still meets Australian safety standards, the Kings Brand Modi‑Plate set on Amazon offers a simple metal plate solution. It’s a handy fallback when you need a universal adapter rather than a brand‑specific kit.check out the Kings Brand headboard bracket.
Checklists you can print and stick on the fridge
When you’re juggling a busy morning routine, a quick visual reminder can save you from a wobble later. Grab a sticky note and jot down these three things:
- Torque setting: 5 Nm for steel brackets, 4 Nm for aluminium.
- Level check: headboard should read flat on a spirit level before the first night.
- Monthly glance: half‑turn on each bolt after a few weeks of use.
It only takes a minute, and it’s a habit that pays off for anyone caring for an elderly loved one or a client with chronic pain.
Choosing the right finish for your climate
Australia’s climate is a mixed bag. If you’re on the coast, a zinc‑galvanised finish will shrug off salty air better than a standard powder coat. In the dryer inland suburbs, a matte black powder coat resists fingerprints and looks sleek with most bedroom hardware. The finish isn’t just about looks; it directly impacts how often you’ll need to re‑torque.
How to avoid the “tighten‑and‑lose” loop
Ever felt that dreaded click when a bolt loosens after a night of sleep? A common culprit is missing lock‑nuts. If your bracket kit didn’t include them, pop a few in – they’re cheap, and they keep the thread from vibrating loose. Another tip: use a thin rubber washer between the bracket plate and the rail. It absorbs micro‑shifts and reduces wear on the metal.
And here’s a little secret most retailers don’t shout about: a tiny dab of thread‑locker (blue, non‑permanent) on the bolt threads can give you an extra few weeks of peace before you need to check again. Just remember to keep a spare bolt handy for future adjustments.
When to upgrade your brackets
If you notice any rust, even a faint line, it’s time to swap. Corrosion weakens the grip and can eventually let the headboard drift. A quick visual inspection after the first month can catch the problem before it becomes a safety issue. For heavy‑duty wooden headboards – think solid oak or reclaimed timber – stepping up to a steel heavy‑duty model is worth the modest extra cost.
On the flip side, if you’ve moved into a smaller apartment and need to relocate the bed often, aluminium brackets keep the overall weight down, making the whole system easier to lift.
Quick FAQ you can bookmark
Q: Do I need a separate bracket for the footboard? Most kits include matching footboard brackets, but if yours didn’t arrive, the same size bracket works as long as the rail spacing matches.
Q: Can I use a 3‑point bracket on a 30 mm rail? Only if the manufacturer states it’s compatible – the mounting plate must sit flush; otherwise you’ll end up with a gap that defeats the purpose.
Keep this cheat‑sheet nearby, and you’ll feel confident that the brackets you chose will stay put, no matter how often the bed is adjusted.
Bottom line: a little extra research, a few smart accessories, and a routine check are the secret sauce that turns a simple bracket into a long‑lasting, wobble‑free support system for anyone who needs reliable sleep comfort.
Conclusion
We’ve walked through measuring, picking material, installing and fine‑tuning your adjustable bed headboard brackets, so you know exactly what to look for.
What does that mean for you? It means fewer wobbles, a steadier headboard, and a night where you can actually relax instead of readjusting bolts.
In our experience at Sleep Sophie, the combination of a solid steel bracket (or lightweight aluminium when appropriate) and a quick torque check saves caregivers countless trips back to the toolbox.
So, before you finish, grab a notebook and tick these three things:
Quick sanity checklist
- Bracket size matches rail gap by at least 2 mm.
- Torque set to 5 Nm for steel, 4 Nm for aluminium.
- Level the headboard and add a washer or shim if needed.
Do you feel confident that your setup will hold up for months, even with daily adjustments? If you still have doubts, give the bolts another half‑turn and run the level test again – it only takes a minute.
Remember, a stable headboard isn’t just a nice‑to‑have; it’s a cornerstone of comfort for chronic‑pain patients, NDIS participants and anyone who spends time sitting up to read.
Ready to enjoy a wobble‑free sleep? Keep this cheat‑sheet on your fridge, give your brackets a monthly glance, and you’ll keep the support solid for years to come.
FAQ
What are adjustable bed headboard brackets and why do I need them?
Adjustable bed headboard brackets are the metal fittings that lock your headboard onto the side rails of an electric base. They keep the board from shifting when you sit up to read or when a caregiver readjusts the position. Without sturdy brackets you risk wobble, which can be uncomfortable for chronic‑pain patients and unsafe for anyone who leans heavily on the board.
How do I choose the right size bracket for my bed?
The key is the rail‑to‑rail gap measured in millimetres. Measure the inner edges of the side rails when the base is fully flat, then pick a bracket that’s at least 2 mm wider than that gap. A 35 mm bracket works for a 33 mm gap, giving a snug fit without forcing the metal. Most kits come in 30, 35 and 40 mm options.
Steel or aluminium – which material is best for my situation?
If you have a heavy wood or shelf‑backed headboard, steel gives the rigidity you need and resists flexing under daily adjustments. For a light, upholstered panel, aluminium reduces overall weight and makes moving the bed easier, especially in small apartments. Coastal homes should favour zinc‑galvanised steel because the extra coating battles salty air that can corrode plain aluminium.
What torque setting should I use when tightening the bolts?
We recommend a torque wrench set to 5 Nm for steel brackets and 4 Nm for aluminium. After the first half‑turn, give each bolt a final twist until the wrench clicks. This tightness is enough to hold the headboard firmly while avoiding damage to the rail’s thin skin. A quick re‑check after a week of daily use is a good habit.
Do I need lock‑nuts or thread‑locker on the bolts?
Lock‑nuts are a cheap way to stop vibration‑induced loosening, especially on beds that are adjusted many times a day. If your kit didn’t include them, pop a few in – they fit most standard M8 bolts. A dab of blue, non‑permanent thread‑locker adds extra peace of mind without making future adjustments painful.
Can I use the same brackets for the footboard?
Most manufacturers design matching footboard brackets that share the same rail spacing, so you can reuse the headboard set if the rail gap is identical. Just double‑check the mounting plate sits flush; a gap means the bracket isn’t the right size and could let the footboard shift when the bed is lowered. If the footboard is heavier than the headboard, consider the steel heavy‑duty model for extra support.
How often should I inspect the brackets for wear or corrosion?
Give the bolts a visual glance and a half‑turn every month, or sooner if you notice any squeaking. Look for rust spots, especially on steel in humid rooms; a faint line means it’s time to replace that piece. Re‑level the headboard after any adjustment to keep the load evenly distributed and prevent long‑term wear.