Ever rolled out of bed and felt that stubborn knot in your neck, like you’ve been sleeping on a brick? You’re not alone – anyone who’s spent nights hunched over a screen or propped up on a too‑high pillow knows that morning stiffness can ruin the whole day.
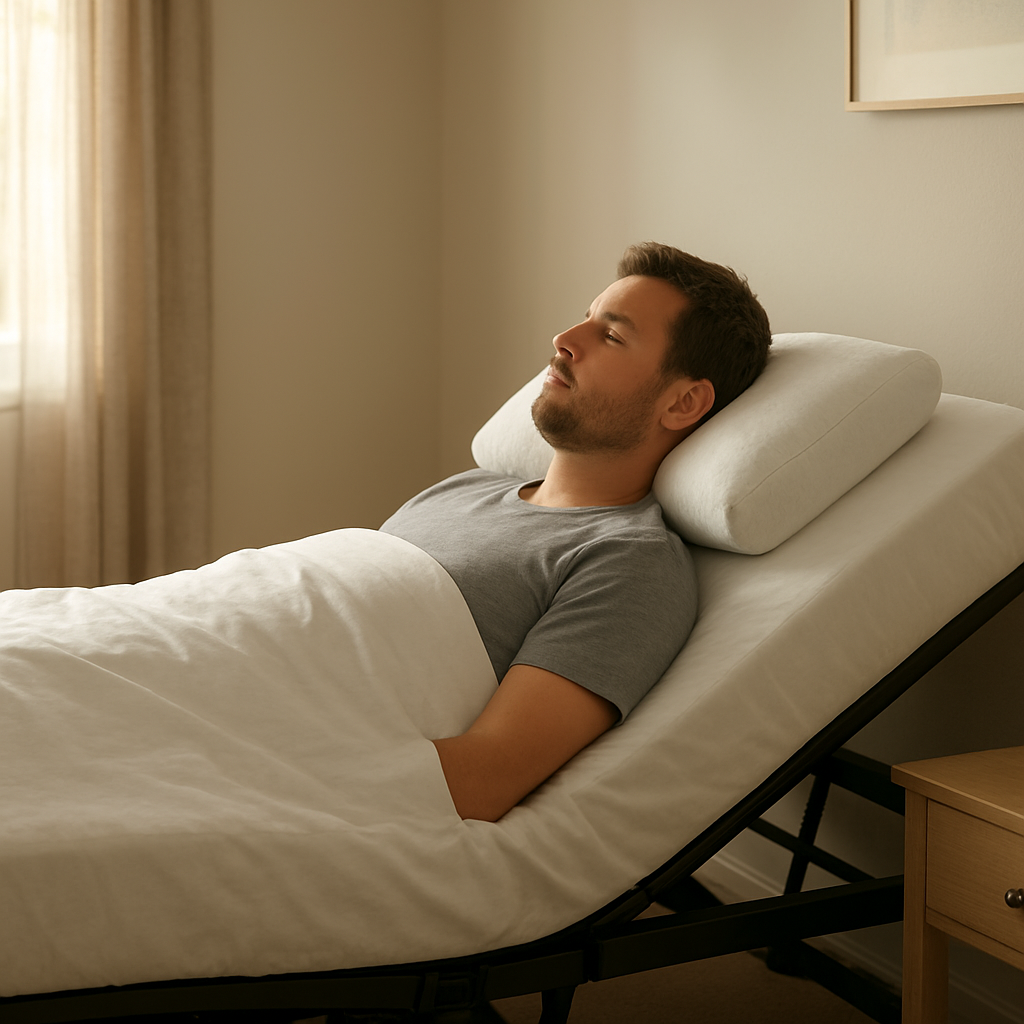
What if the solution was as simple as tweaking the angle you lie in? An adjustable bed for neck pain lets you raise the head‑section just enough to keep your cervical spine in a neutral curve, easing the pinch on those delicate discs. Think of it as giving your neck a gentle, supportive hug while you drift off.
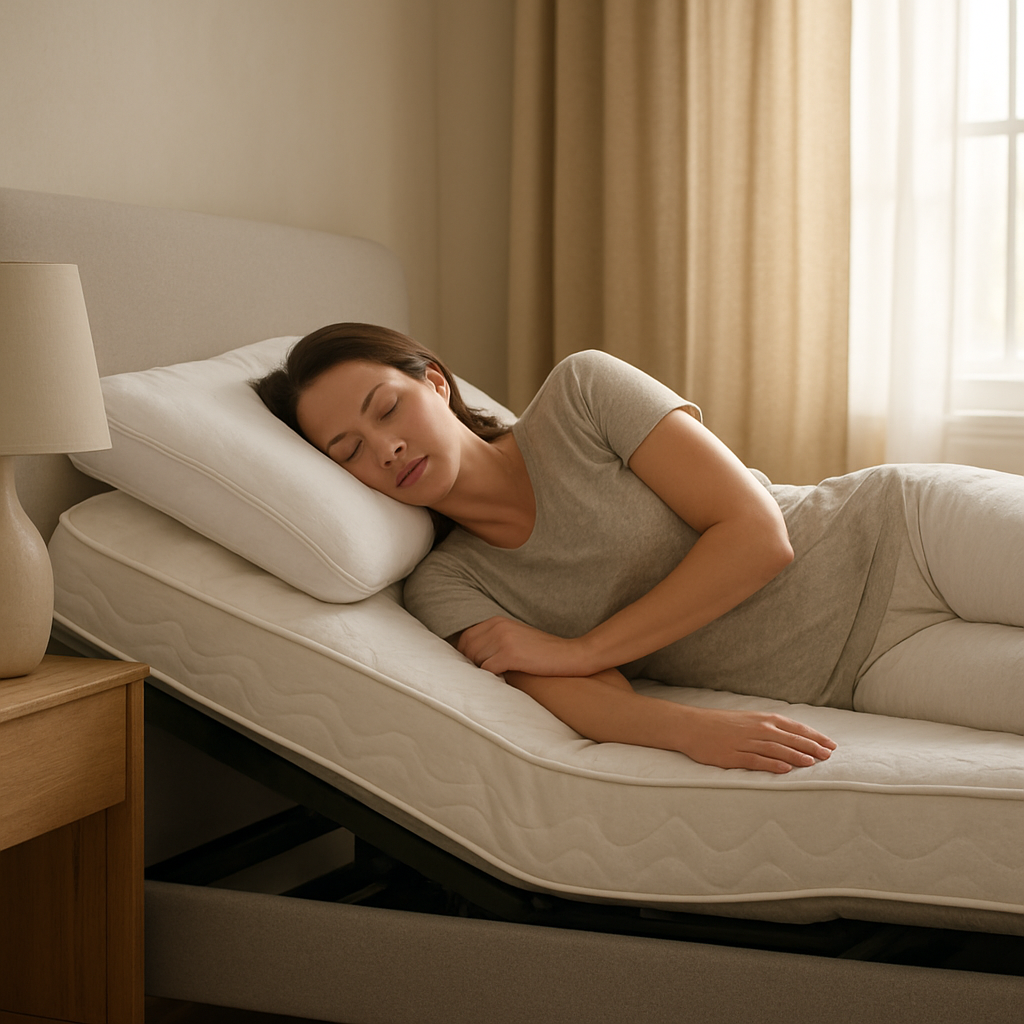
Take Sarah, a NDIS participant who struggled with chronic neck tension after long physiotherapy sessions. She swapped her flat mattress for an adjustable base and set the head‑end to about 35 degrees. Within a week she reported waking up with far less stiffness, and her therapist noticed improved posture during rehab.
Here’s a quick, no‑nonsense routine you can try tonight:
- Start with the head‑rail at a low incline (10‑15°) and notice how it feels.
- Gradually raise it by 5° every two nights until you reach a comfortable 30‑45° – the sweet spot for most neck‑pain sufferers.
- Pair the tilt with a contour pillow that fills the gap between shoulder and ear; this prevents the head from sliding down.
- Save a preset “Neck Relief” position on the remote so you can hit it with one button.
For those who want a proven model, Sophie Adjustable Beds combine smooth motorised lifts with quiet operation, perfect for shared rooms or early‑morning adjustments.
Don’t forget the little details: keep the remote within arm’s reach (especially for seniors), ensure the mattress isn’t too soft – a medium‑firm feel supports the spine better – and test the position after a night’s sleep. If you still feel a twinge, try a slightly lower angle or add a cervical‑support pillow.
Bottom line: a modest head‑raise can transform a night of restless tossing into a restorative rest, giving you the freedom to start each day without that nagging neck ache.
TL;DR
If you’re waking up with a stiff neck, a modest head‑raise on an adjustable bed for neck pain can gently realign your spine and turn restless tossing into soothing sleep. Try raising the head 10‑15°, increase by 5° every two nights, pair with a contour pillow, and you’ll notice less morning ache and more energy for your day.
Step 1: Assess Your Current Sleep Position
Ever woken up feeling like you’ve been sleeping on a rock? You’re not imagining it—your neck is trying to tell you the way you’re lying down just isn’t doing it any favors. Before you start fiddling with angles, take a moment to actually notice where your head ends up when the lights go out.
First, lie on your adjustable bed in its default flat position. Keep a notebook handy or use your phone’s notes app. When you’re about to drift off, jot down a quick snapshot: Are you a side‑sleeper, a back‑sleeper, or do you curl up like a turtle? Do you tend to drift toward the pillow’s edge, or does your head stay centered?
Identify Your Natural Alignment
Once you’ve captured that baseline, gently open the head‑rail by just a few degrees—think 5°—and notice any shift. Does your neck feel a tad more open, or does it start to feel cramped? The goal is to find that sweet spot where the cervical spine maintains its natural ‘S’ curve, rather than flattening out or over‑arching.
It helps to have a friend or a caregiver give you a quick visual check. From the side, you should see a gentle dip in the neck area, not a straight line. If you can’t get a second set of eyes, use a mirror placed at head height and glance at the profile of your sleeping posture.
Side sleepers often discover that a slight head‑raise eases the pressure on the shoulder and opens up the neck space. Back sleepers might need a more modest lift, just enough to keep the lower spine from flattening. And if you’re a stomach‑sleeper, you’ll probably want to keep the incline minimal because turning your head to the side can twist the neck.
Test and Tweak
Now, play the “two‑night test.” Keep the head‑rail at the angle you just tried for one night, then the next night, adjust by another 5°. Record how you feel each morning—any reduction in stiffness, or does the ache move elsewhere? Over a week, you’ll start to see a pattern emerge.
Don’t forget to pay attention to how your pillow interacts with the new angle. A contour pillow that cradles the neck can make a modest lift feel like a full‑body hug, while a regular pillow might let your head slide down, negating the benefits.
Here’s a quick checklist to run through each night:
- Did you wake up with less neck tension?
- Did you notice any new pressure points on shoulders or lower back?
- Is the head staying in place, or does it drift?
If the answer is “yes” to the first two and “no” to the third, you’re on the right track.
And remember, comfort is personal. What works for a 70‑year‑old caregiver might feel too aggressive for a younger athlete. Trust your body’s feedback above any rule of thumb.
For a visual walk‑through of how to adjust and assess, check out the short video below. It walks you through the exact steps we use with many of our clients who rely on an adjustable bed for neck pain to get a better night’s rest.
After you’ve watched the video, give yourself a moment to breathe and picture the next night’s setup. A small change now can prevent a whole day of neck aches later.
Finally, take a snapshot of your preferred angle and save it on the remote. Most adjustable beds, including those we recommend, let you name presets—so you can hit “Neck Relief” with a single press. That way, you won’t have to remember the exact degree each morning.
Assessing your current sleep position is the foundation of any neck‑pain relief plan. It’s not a one‑size‑fits‑all exercise; it’s a personal discovery, and the more honest you are with yourself, the quicker you’ll find that comfortable, pain‑free zone.
Step 2: Choose Adjustable Bed Features That Support Neck Alignment
Now that you’ve spotted where you tend to lie, it’s time to let the bed do the heavy lifting. Not every adjustable base is created equal – the devil is in the details, especially when you’re targeting neck pain.
First, look for a head‑rail that can move in small, precise increments. A 5‑degree step‑motor gives you enough granularity to fine‑tune the angle without overshooting that sweet spot. In our experience, a range of 10‑45° covers the majority of neck‑friendly positions. Anything less than 10° feels almost flat, and anything above 45° can push the chin forward and re‑introduce strain.
Key features to scan for
| Feature | Why it matters for neck alignment | Practical tip |
|---|---|---|
| Dual‑motor head lift | Separate motors for head and foot give smoother, quieter raises and keep the head steady. | Choose a model with a whisper‑quiet motor (under 45dB) if you share the room. |
| Adjustable height legs | Keeping the nightstand within reach prevents you from twisting to grab a glass of water. | Set legs so the bedside table is level with the mattress surface. |
| Preset “Neck Relief” position | One‑button memory saves the exact angle you discovered works for you. | Program a preset after a week of trial‑and‑error and use it every night. |
What about the remote? A well‑designed remote puts the controls at arm’s length, which is a blessing for seniors or anyone with limited mobility. Look for tactile buttons and a back‑lit display – you’ll thank yourself during those early‑morning adjustments.
And don’t forget the mattress. A medium‑firm feel supports the cervical curve while still allowing the base to flex. If you’re using a memory‑foam topper, make sure it’s no more than 2‑3 cm thick; otherwise the lift can feel sluggish.
So, how do you actually pick a bed? Here’s a quick, actionable checklist:
- Confirm the head‑rail can lift at least 45° in 5° increments.
- Verify dual‑motor operation for smooth, silent movement.
- Make sure the remote has a dedicated “memory” button.
- Check that the leg height is adjustable and stable.
- Read the warranty – look for at least 5 years on the motor.
One of our customers, an NDIS participant with chronic neck tension, swapped to a base with a dual‑motor head lift and a custom “Neck Relief” preset. Within ten nights she reported a noticeable drop in morning stiffness and her physiotherapist noted improved posture during sessions.
If you’re still unsure which model to choose, our guide on pillow positioning walks through pairing the right pillow with your chosen tilt – a combo that many of our clients swear by.
Finally, remember that technology alone won’t fix everything. Pair the right features with a nightly stretch routine – chin‑to‑chest rolls, side‑lying shoulder rolls, and gentle neck extensions – and you’ll turn that adjustable bed into a real therapeutic ally.
Video: How to Adjust Your Bed for Optimal Neck Support
Let’s be honest: neck pain first thing in the morning is a signals that your spine isn’t getting the support it needs while you sleep. The right head elevation can turn a stiff, groggy morning into a more refreshed start. If you’re exploring an adjustable bed for neck pain, this quick, practical guide is for you—and yes, it’s something you can try tonight.
In our experience, most relief comes from a modest tilt that keeps the neck’s natural curve intact. It’s not about blasting your head up to 90 degrees; it’s about finding a comfortable angle that keeps your shoulders relaxed and your jaw from tensing. So, what should you do next? Let’s walk through a simple, real‑world routine you can follow step by step.
First, a quick note on gear. Look for a base with a precise head lift, ideally in small increments (5° steps are perfect). A dual‑motor design helps keep the head steady as you adjust. And if you can save a favorite position with a memory button, that’s a real time saver for nights when you want consistency without fiddling with remotes ad‑hoc.
Now, let’s get practical. The steps below mirror what people in Australia‑based sleep clinics and caregivers tell us works best for neck alignment and comfort. You’ll notice the rhythm: small changes, a few nights to test, and a clear sense of what feels right for your neck and shoulders.
What to look for in your adjustable bed
Choose a base with a head lift that you can dial in by 5° increments. The sweet spot for many neck‑pain sufferers sits in roughly 10° to 45°. Start lower and creep up until you feel your neck relax, not pinch. A quiet, smooth lift matters if you share a room or if you’re an early riser.
Pair the lift with a supportive setup: a contour pillow that fills the gap between your shoulder and ear, and a mattress that isn’t too soft. If you’re using a memory foam topper, keep it modest—2 cm or less—so the bed’s tilt remains responsive rather than sinking into the foam.
Here at Sleep Sophie, we’ve seen how a gentle tilt combined with a well‑chosen pillow can dramatically soften morning stiffness for many chronic‑pain sleepers. It’s not magic; it’s a measured, repeatable approach to spinal alignment that you can own at home.
Step-by-step night‑by‑night plan
- Begin with a mild incline, about 10°–15°. Lie down and notice how your neck and shoulders feel. If you wake feeling looser, you’ve found a good starting point.
- Boost in 5° increments every two nights. Most people settle into a comfortable range around 25°–40°. Avoid exceeding 45° for long stretches, which can tilt the head forward and re‑pressure the neck.
- Test pillow support. Use a contoured pillow that supports the natural curve without pushing your chin forward. A well‑tuned tilt works best with the right pillow.
- Save a preset. If your base has a memory button, program a “Neck Relief” position once you’ve dialed in the sweet spot. One‑tap relief is a real game changer on busy mornings.
- Fine‑tune based on how you wake. If stiffness lingers, try a notch lower or shift to a slightly different pillow height. Small adjustments yield noticeable gains over a week.
So, does this approach actually work for you? Start tonight with a 10° incline and commit to tracking your morning stiffness for a week. If you notice a calmer neck and clearer shoulders, you know you’ve found your baseline.
If you’re curious about the broader benefits of tilt and how it complements neck‑pain relief, keep the conversation with your care team. And remember: this is about practical, repeatable steps you can trust, not hype. A modest head raise paired with steady nightly practice is often enough to tilt the odds in your favor.
Step 3: Pair the Bed with the Right Pillow and Mattress
Let’s be honest: a great tilt is nothing without the right pillow and mattress to hold your neck in neutral alignment.
In our experience at Sleep Sophie, the pillow is the first line of defense. A contoured pillow that follows the curve from your ear to your shoulder keeps your head from tipping forward as the bed lifts.
When the tilt is subtle (think 10°–30°), a slender, well-shaped pillow can do magic. Too tall, and you push the chin forward; too flat, and your neck collapses into the shoulder. The goal is a gentle, uninterrupted cylinder from head to spine.
Choose the right pillow height and contour
Look for a pillow rated to support cervical curvature, ideally with a slight loft that matches your shoulder width. If you’re side sleeping, you’ll likely need a bit more height on the pillow to keep the ear aligned with the shoulder. If back sleeping, a medium loft often works best. Remember: your head should sit level, not tipped forward or back.
Test the pillow with your head raised on the incline you’ll actually use. The tilt should feel supported, not strained.
For more on adjustable pillow options, many readers find the Sleepgram adjustable pillow helpful, which offers adjustable height to align the neck with the spine. Sleepgram adjustable pillows can be part of your setup.
Match the mattress to the tilt with a focus on support, not sinking. A medium-firm mattress works well for most tilt configurations because it resists excessive sinking when the head is elevated. If your topper is memory foam, keep it slim—2–3 cm max—so the bed’s lift remains responsive. A touch of bounce in the top layer helps you shift positions without waking a partner.
Consider a base that maintains spine alignment while you move. The mattress should support the cervical curve, not flatten it when you raise the head. In many cases, pairing a contour pillow with a supportive, not-too-soft mattress is enough to relieve neck strain across a typical night.
Here’s a simple, actionable night-by-night plan:
- Set the head rail to your starting incline (10°). Sleep a night and notice how your neck feels.
- Increase by 5° every two nights until you reach a comfortable 25°–40° range.
- Pair with a contour pillow; adjust height until the line from ear to shoulder is straight.
- Save a preset if your base supports memory; one-tap relief makes mornings smoother.
- Fine-tune based on how you wake. If stiffness lingers, try a notch lower or shift to a different pillow height.
Does this actually help? In our experience, yes—provided you give your body a few nights to adapt. A modest tilt, the right pillow, and a supportive mattress can cut morning neck stiffness and help you start the day more relaxed.
For credibility and context on mattress choices that work with adjustable bases, see the National Council on Aging guide on best mattresses for adjustable beds. Learn more about mattress choices.
Step 4: Maintenance and Ergonomic Settings for Long‑Term Relief
Alright, you’ve got the tilt just right and the pillow doing its job. The next question most people forget is: how do you keep that sweet spot working night after night? Think of your adjustable bed for neck pain like a car – you wouldn’t drive forever without an oil change, right?
Here’s the low‑down on caring for the mechanism and fine‑tuning the ergonomics so you stay pain‑free for the long haul.
1. Routine mechanical checks
Every few months, give the base a quick once‑over. Look for loose bolts, wobbly legs, or any humming sounds that seem louder than usual. Tightening a screw with a simple Allen key can stop a motor from grinding later on.
And remember the weight limit – most Australian models comfortably hold up to 750 lb, but regularly exceeding that can wear the motor faster. If you share the bed with a partner, make sure both of you stay within the spec.
Need a step‑by‑step checklist? The adjustable base maintenance guide walks you through exactly what to look for.
2. Cleaning & dust prevention
Dust might seem harmless, but it can settle into the motor housing and make the lift noisier. Every two months, vacuum around the hinges and wipe the frame with a damp cloth. Avoid harsh chemicals – a little mild soap and water does the trick.
Spills are another silent threat. A splash of water near the power cord can short‑circuit the system. Keep a waterproof mattress protector on top and place a small tray for night‑stand glasses.
3. Ergonomic tweaks as you evolve
Our bodies aren’t static. As you get stronger, or if you start using a new pillow, the optimal angle might shift. That’s why you should revisit your settings every 4‑6 weeks.
Ask yourself: “Do my shoulders still feel relaxed?” If you notice a new twinge, drop the head‑rail by 2‑3° or experiment with a slightly higher pillow. Small moves add up.
Research shows that keeping the head at a stable angle—often around 45° for severe cases—can dramatically reduce neck strain how adjustable beds help neck pain. So don’t be afraid to fine‑tune as your comfort evolves.
4. Build a simple maintenance calendar
- Month 1: Inspect bolts, tighten if needed.
- Month 2: Vacuum motor tracks and wipe down the frame.
- Month 3: Test the remote; replace batteries if it feels laggy.
- Month 4: Re‑evaluate tilt – note any new aches.
- Month 5: Deep clean mattress cover and check for moisture.
- Month 6: Repeat the cycle.
Mark these dates on your phone or a kitchen calendar – a reminder pops up, you do a quick check, and you’re back to blissful sleep.
Pro tip for caregivers: keep the remote in a bedside holder with a soft rubber grip. Dropping it repeatedly is a common cause of remote failure, and a simple holder can extend its life dramatically.
Finally, don’t overlook the power source. A stable plug and a surge protector keep the electronics safe from voltage spikes that could otherwise fry the motor. If you ever notice the bed hesitating to lift, it might be a power issue before a mechanical one.
By treating your adjustable bed for neck pain like a living partner – checking in, cleaning up, and adjusting as you grow – you’ll keep that supportive hug working night after night, without costly repairs or surprise breakdowns.
Conclusion
We’ve walked through how a modest head‑rail lift can turn a stiff‑neck morning into a smoother start.
Remember, the magic isn’t in a single setting – it’s the habit of checking the angle, pairing the right pillow, and keeping the mechanism tidy.
So, what’s the next step? Grab your remote, set the head‑rail to the lowest comfortable incline you felt good on, and lock that position as your “Neck Relief” preset. If you’re caring for an older family member, tuck the remote in a soft bedside holder – it saves clicks and protects the device.
Every month, give the base a quick glance: tighten any loose bolts, vacuum the tracks, and swap out remote batteries. Those five‑minute checks keep the lift humming and your neck happy.
In our experience at Sleep Sophie, users who stick to this simple maintenance calendar report far fewer surprise breakdowns and more consistent relief.
Finally, listen to your body. If your shoulders start to feel tight again, dial the angle down a couple of degrees or try a slightly different pillow height. Small tweaks compound into big comfort over weeks.
Ready to make the adjustable bed for neck pain a lasting part of your sleep routine? Give it a try tonight and see how quickly the morning stiffness fades.
FAQ
What is an adjustable bed for neck pain and how does it work?
An adjustable bed for neck pain is a motor‑driven platform that lets you raise the head‑rail in small increments. By tilting the upper part of the mattress, you create a gentle incline that keeps the cervical spine in its natural curve, reducing compression on the discs. The lift is silent, so you can adjust it from your bedside without disturbing anyone, and the angle can be fine‑tuned to suit your comfort level.
How much should I tilt the head‑rail to relieve neck stiffness?
Start with a modest 10‑15° lift and spend a night or two sleeping that way. If you wake up feeling looser, raise the angle by another 5° every two nights until you land between 25° and 40°, which is the sweet spot for most sleepers. Avoid going above 45° because a steep angle can push the chin forward and re‑introduce strain. Small, incremental changes let your body adapt without surprise aches.
Do I need a special pillow when using an adjustable bed for neck pain?
Yes – a contoured or cervical‑support pillow works best. The pillow should fill the gap between your shoulder and ear so your head stays level as the bed lifts. If the pillow is too high, it forces the chin forward; too low and your neck collapses into the mattress. Pair a medium‑firm mattress with a pillow that matches your sleep position, and you’ll keep the spine aligned throughout the night.
Can an adjustable bed help elderly users or NDIS participants with limited mobility?
Absolutely. The remote‑controlled lift means you don’t have to struggle to get in or out of bed, and the “memory” preset lets you return to your preferred neck‑relief angle with a single button. For seniors, placing the remote on a soft bedside holder prevents accidental drops. The gentle head‑raise also reduces the effort required to sit up, making morning routines safer and more comfortable.
How often should I maintain my adjustable bed to keep the neck‑relief setting effective?
Do a quick check every month: tighten any loose bolts, vacuum dust from the motor tracks, and replace remote batteries if they feel sluggish. A bi‑monthly wipe‑down of the frame with a damp cloth keeps the mechanism quiet. If you notice a new twinge in your neck, revisit the tilt setting – a 2‑3° adjustment can make a big difference after a few weeks of use.
Is an adjustable bed safe to use with a CPAP machine for sleep apnea?
Yes, most modern adjustable bases have a low‑profile head‑rail that clears the CPAP mask and tubing. Just make sure the head‑rail is set low enough that the mask doesn’t get pulled off when you raise the bed. If you’re unsure, test the setup by gently lifting the head‑rail while wearing the mask; you should feel no tension on the straps or tubing.
What should I do if I still wake up with neck pain after trying the adjustable bed?
First, double‑check your pillow height – a small change can correct misalignment. Next, experiment with a slightly lower or higher angle; even a 2° shift can relieve pressure points. Finally, incorporate a gentle neck‑stretch routine before bed, such as chin‑to‑chest rolls or side‑lying shoulder circles. If discomfort persists, consider a professional assessment to rule out underlying issues that may need targeted therapy.
Additional Resources
Looking for a little extra help after you’ve fine‑tuned your tilt? Below are a handful of free resources that can keep your adjustable bed for neck pain working like a charm.
Printable maintenance checklist
Download a one‑page PDF that reminds you to tighten bolts, wipe dust from the motor tracks, and swap remote batteries every month. A quick glance on the kitchen wall makes the routine feel almost effortless.
Step‑by‑step guide PDFs
We’ve compiled easy‑to‑follow PDFs that walk you through the ideal pillow‑to‑bed ratio, the best head‑rail angles for side‑sleepers, and how to set a “Neck Relief” memory button. Print them out and keep them by the bedside for nightly reference.
Online community forum
Join the Sleep Sophie discussion board where NDIS participants, seniors, and chronic‑pain sufferers swap tips, share success stories, and answer each other’s questions. Real‑world feedback often uncovers tweaks you’ll never find in a product manual.
Ask a physiotherapist
Many Australian physiotherapy clinics offer a free 15‑minute tele‑consultation about sleep ergonomics. Bring your adjustable bed settings to the call; a professional can suggest a micro‑adjustment that may erase that lingering twinge.
Take one resource today, give your setup a quick once‑over, and notice how a few minutes of extra care can turn an adjustable bed for neck pain into a long‑term partner for better mornings.