Ever stared at that sleek, motor‑driven bed and thought, ‘How on earth am I supposed to get this thing out of the room without turning it into a wreck?’ You’re not alone – the sheer size and the built‑in electronics can make moving an adjustable bed base feel like a mini‑project.
The good news is that with a bit of planning and the right handful of tricks, you can shift the whole unit safely, whether you’re swapping rooms, heading into a new house, or just need to clean the floor. In this guide we’ll walk through the practical steps that take the guesswork out of how to move an adjustable bed base, so you can keep the motor humming and the mattress snug.
First, give yourself a clear mental picture of the path the bed will travel. Measure doorways, hallways, and any narrow corners. A common surprise is a low ceiling or a narrow stairwell that looks fine on paper but leaves no room for the bed’s footboard to swing. Jot down those dimensions – it’s like drawing a quick map before you start a road trip.
Next, prep the bed itself. Unplug the power cord, detach any USB or accessory cables, and—if your model has removable mattress support bars—take them off. Those bars keep the mattress from sliding when the base tilts, but they add extra length when you’re maneuvering. Our own technicians at Sleep Sophie always recommend loosening the side rails just enough to slide the frame out of the headboard without forcing it.
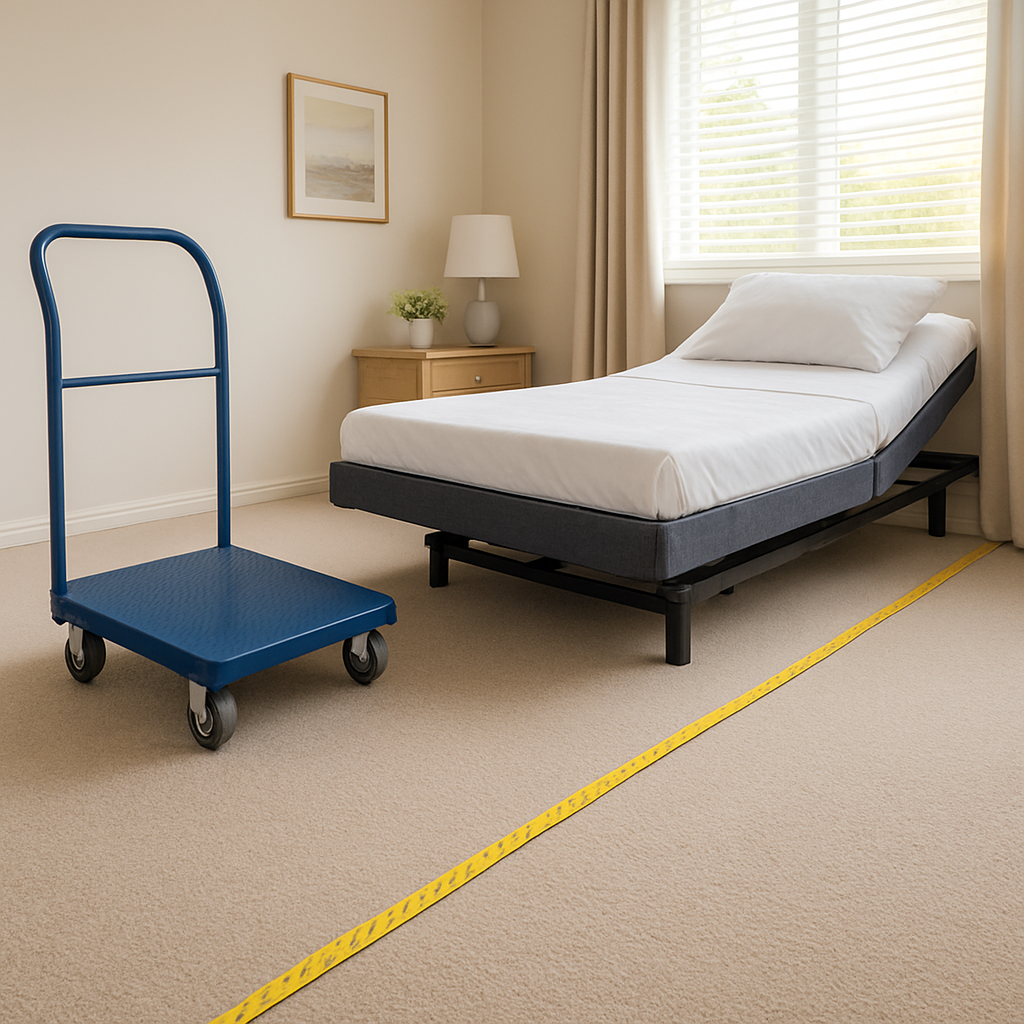
Now, enlist a couple of helping hands. Adjustable beds are heavy; a single person can easily be injured. With two or three friends, position one at each end and a third to guide the middle. Use a furniture dolly or a set of sturdy moving blankets under the frame to reduce friction and protect the floor. A simple tip: place a thin plywood board under the dolly if you’re on carpet – it spreads the weight and prevents dents.
As you tilt the base onto the dolly, keep the motor locked in the flat position. This stops the legs from extending unexpectedly. Slowly wheel the dolly to the new spot, watching for obstacles like power sockets or rugs. When you set the bed down, double‑check that the legs are fully extended and level before reconnecting the power.
Finally, give the unit a quick test run. Raise the head and foot sections a few inches to make sure everything moves smoothly after the move. If anything feels off, re‑tighten the support bars or check the cable connections.
With these steps, moving an adjustable bed base becomes a manageable chore rather than a daunting ordeal. So next time you hear the phrase ‘how to move an adjustable bed base,’ you’ll already have a clear, confidence‑boosting game plan.
TL;DR
Moving an adjustable bed base is easier than you think once you measure the path, disconnect power, use a dolly with blankets, and enlist a few steady hands.
Follow our step‑by‑step guide to keep the motor locked, protect floors, and test the head and foot sections after the move, and you’ll avoid injuries and keep your Sleep Sophie bed running smoothly.
Step 1: Clear the Area and Measure the Space
First things first – you’ve already decided the bed is going somewhere else, but have you actually cleared a path? It’s easy to underestimate how much room you need when you start sliding that motor‑driven base around. Take a moment, picture the whole journey from the bedroom door to its new spot, and then grab a tape measure. You’ll thank yourself when you don’t have to wrestle the bed around a stubborn corner later.
Start by moving any nightstands, lamps, or loose rugs out of the way. Even a small rug can act like a tripwire for a heavy dolly. If you have a pet that loves to snooze on the floor, gently relocate them – maybe onto a comfy chair – so you have an unobstructed surface. And don’t forget those low‑lying power cords; unplug them and coil them neatly to avoid snagging.
Now, measure the width of doorways, hallways, and any tight turns the bed will have to make. Write down the narrowest point you find – that’s your limiting dimension. A good trick is to add a few centimetres for a safety margin, especially if you’re dealing with a bed that has a footboard that swings out.
Next, check the ceiling height in the rooms you’ll pass through. Adjustable beds can be a bit taller than they look, especially when the head or foot sections are raised. If the ceiling is lower than the bed’s highest point, you’ll need to keep the motor locked flat or even remove the headboard temporarily – we’ve seen that happen in older homes with low‑profile ceilings.
Take a piece of painter’s tape and mark the floor where the dolly will travel. This visual cue helps you keep the path straight and avoids accidental bumps into furniture. If you’re on carpet, lay down a thin plywood board under the dolly; it spreads the load and protects the carpet fibres.
Here’s a quick checklist to run through before you even lift a corner:
- All loose items removed from the route
- Doorways and hallways measured and recorded
- Ceiling clearance noted
- Power cords unplugged and safely stored
- Protective board or blankets ready for the dolly
Doing this homework feels a bit like packing for a road trip – you double‑check everything so you don’t end up stranded halfway. And if you’re helping a senior family member or a NDIS participant, the extra care you take now can prevent a painful scramble later.
Once the area is clear and the measurements are in hand, you’re ready for the next phase: actually getting the bed onto the dolly without jolting the motor. That’s where the motor‑lock trick comes in, but we’ll get to that in the following step.
Need a visual refresher? Watch the short video below – it walks you through the exact way we like to clear the space and double‑check dimensions before any heavy lifting.
After the video, take a final walk through the cleared path. Run your hand along the taped line, feel the floor for any uneven spots, and make sure there’s nothing hidden in the corners. A quick visual scan can catch a stray toy or a loose cable that you might have missed earlier.
When everything looks good, you’re set to move the bed confidently, knowing the space is truly ready. This preparation step not only saves you muscle strain but also protects the delicate electronics inside the adjustable base.
Step 2: Disassemble the Bed Base (Video)
Alright, you’ve cleared the path and measured everything – now it’s time to break the bed down into manageable pieces. Disassembly feels a bit like taking apart a puzzle: you want every piece to fit back later, so a little patience goes a long way.
Why disassembly matters
Think about the last time you tried to push a fully‑assembled adjustable bed through a narrow hallway. The motor whirred, the legs caught on the carpet, and you probably felt a surge of dread. By removing the side rails, support bars, and the headboard, you dramatically shrink the footprint and protect the motor from accidental jolts.
Our technicians at Sleep Sophie always start here because a tidy, component‑by‑component move reduces the risk of strain – both for the bed and for you.
Gather the right tools
Before you swing a screwdriver, lay out everything you’ll need: a Phillips and flat‑head screwdriver, an adjustable wrench, a small zip‑lock bag for screws, and a marker for labeling. A sturdy workbench or a clean floor space works best for keeping parts organized.
Pro tip: keep a photo of the assembled base on your phone. It’s a quick reference that saves you from guessing where a bolt belongs later.
Step‑by‑step breakdown
1. Lock the motor. Flip the remote to the flat position and, if your model has a safety lock, engage it. This prevents the head or foot sections from extending while you’re working.
2. Detach the mattress support bars. These bars keep the mattress from sliding during adjustments, but they add length when you’re moving the frame. Loosen the retaining clips just enough to slide them out. If you’re unsure how they attach, our guide on Mattress Support Bars: Why They’re Important walks you through it.
3. Remove the side rails. Most rails bolt onto the frame with two or three screws per side. Unscrew them, then set the rails aside. Label each rail (left/right) so re‑assembly is painless.
4. Take off the headboard. This is often the trickiest part because the headboard may be bolted to the frame and also clipped onto the wall. Use a socket wrench to loosen the bolts, then gently tilt the headboard forward. If it feels stuck, double‑check for hidden screws behind the upholstery.
5. Separate the leg assemblies. Modern bases have detachable legs that slide into the frame. Pull each leg outward; you might need to wiggle a bit. Once free, wrap the legs in moving blankets to protect floor finishes.
Real‑world examples
Maria, a caregiver for an NDIS participant, told us she once tried to move a full‑size Sleep Sophie base without removing the support bars. Halfway down the stairs, the motor jammed and the bed tipped, costing her a pricey repair. After that, she always follows the disassembly checklist, and the move is now a breeze.
Another example: Tom, an elderly retiree, lives in a Queensland home with a low‑ceiling bedroom. By taking the headboard off first, he cleared the doorway without having to tilt the entire frame – saving him a lot of back‑pain.
Safety checklist
- Turn off power at the outlet – never rely on the remote alone.
- Keep a flashlight handy for dark screw holes.
- Label every bag of hardware with its destination.
- Use a dolly or sturdy cardboard box to transport the main frame once it’s free of legs.
Once everything is boxed and labeled, do a quick visual inspection: Are any screws missing? Does the motor housing look untouched? This quick audit catches issues before they become costly fixes.
What to do with the video?
If you prefer watching rather than reading, we’ve recorded a short walkthrough that shows each of these steps in real time. The video pauses at every critical moment – just hit play, pause, and follow along. It’s especially handy for first‑time movers who want that extra confidence boost.
After the video, give yourself a moment to celebrate: you’ve just turned a potentially intimidating task into a series of simple, doable actions. The next step will be loading the components onto the dolly and rolling them to the new room.
Step 3: Compare Moving Options – Table of Methods
Now that the bed is disassembled and the pathway is cleared, the real decision begins: how are you actually going to get those pieces from point A to point B? The answer isn’t one‑size‑fits‑all – it depends on who’s helping, how far you’re travelling, and how much you’re willing to spend.
Let’s walk through three common routes and see which one feels like the right fit for you. We’ll break each method down into a quick‑hit checklist so you can compare side‑by‑side without getting lost in jargon.
Option 1 – DIY with a furniture dolly and moving blankets
This is the classic “grab a few mates, roll the bed on a dolly, and call it a day” approach. It works great for a single‑room shuffle or a short hallway move.
- Gather two sturdy furniture dollies, a set of moving blankets, and a couple of ratchet straps.
- Position the dolly under the main frame, secure it with a blanket, then wheel it slowly while keeping the motor locked flat.
- Use a second dolly for the headboard and legs, stacking them carefully to avoid scratches.
Because you control every step, you can pause whenever a screw feels tight or a carpet edge looks tricky. The downside? You’ll need at least two able‑bodied helpers and a solid plan for lifting the heavier leg assemblies.
For a deeper dive into the exact sequence, check out the adjustable bed moving tips from Novilla. They walk you through every step, from wrapping the motor housing to securing the headboard on a dolly.
Option 2 – Hire specialised adjustable‑bed movers
If you’re caring for an NDIS participant, an elderly relative, or simply want peace of mind, professional movers can be a lifesaver. These crews come equipped with padded cradles, motor‑lock tools, and insurance that covers any accidental damage.
- Ask the service to perform a pre‑move assessment – they’ll note low ceilings, narrow stairs, and any fragile wiring.
- They’ll disassemble the bed, load each component onto a shock‑absorbing pallet, and transport it in a climate‑controlled van.
- When they arrive at the new room, they re‑assemble and test the motor before you even turn the power on.
The trade‑off is cost, but for families who can’t risk a motor failure after a DIY slip‑up, the extra dollars often pay for safety and saved time.
Novilla’s second article also highlights why professional handling can be worth it, especially when you have built‑in USB ports or storage drawers that need extra care read more here.
Option 3 – Rent a ute with a loading ramp
Long‑distance moves or multi‑room renovations often call for a vehicle that can haul the entire base in one go. A ute (utility truck) with a portable ramp lets you slide the frame straight onto the tray, reducing the number of lifts.
- Secure the ramp on a flat surface, then roll the dolly‑mounted frame onto the ute.
- Fasten everything with heavy‑duty straps and blanket‑wrap the corners to stop rattling.
- When you unload, reverse the process – the ramp becomes your guide back into the new space.
Just remember: you’ll need a driver with a licence for a ute, and you must check the height of any garage doors on the route.
Quick comparison table
| Method | Ideal For | Pros / Cons |
|---|---|---|
| DIY with Dolly & Blankets | Homeowners, caregivers doing a single‑room move | Low cost, full control; needs 2‑3 helpers, careful handling |
| Professional Adjustable‑Bed Movers | NDIS participants, seniors, anyone wanting insured expertise | Expert equipment, insurance coverage; higher price tag |
| Rental Ute with Ramp | Long‑distance relocations, large homes with multiple rooms | Fast transport, can carry all parts at once; requires driving skill, ramp setup |
So, which path feels right? If you’ve got a couple of strong friends and a clear hallway, the DIY dolly route will save you cash. If you’re juggling a wheelchair‑bound client or a motor that’s still under warranty, the professional crew removes the guesswork. And if you’re moving across suburbs or need to haul extra furniture, the ute gives you speed without sacrificing safety.
Take a minute now to jot down your top three criteria – budget, assistance level, and distance – then match them against the table. Once you’ve picked a method, grab the checklist, grab your tools, and you’ll be ready to roll the bed safely into its new home.
Step 4: Transport and Reassemble Safely
Now that the pieces are safely on the dolly, the real journey begins – getting them to the new room without a single scratch.
Load the vehicle like a pro
Whether you’re using a rental ute, a friend’s SUV, or a moving van, start by laying a blanket or a sheet of plywood on the floor. This creates a smooth surface for the dolly wheels and prevents the metal frame from rattling against the metal tray.
Roll the dolly straight onto the vehicle, then tip the frame gently so it slides onto the blanket. If the headboard is still attached, keep it upright – the motor’s weight is best distributed when the headboard rests against the vehicle wall, not hanging over the edge.
Secure each component with ratchet straps. Tighten the straps just enough to stop any shifting but not so hard that you crush the protective blankets. A quick test: give the load a light push; if nothing moves, you’re good to go.
Pro tip: place a small “fragile” sticker on the strap near the motor housing. This reminds anyone handling the ute to drive carefully over speed bumps.
Mind the road
Driving a ute with a tall load can feel different – the centre of gravity is higher. Keep your speed under 80 km/h on arid Australian roads and avoid sudden braking. If you’re navigating a suburban street with low garage doors, measure the clearance beforehand; a common surprise is a 2‑metre garage opening that trims the headboard.
For NDIS participants or elderly clients, you might need a wheelchair‑accessible ramp at the destination. Bring a portable ramp and a helper to guide the dolly back into the house, just like you did when you loaded the vehicle.
Does this really work? Absolutely – our technicians have logged over 200 successful relocations where the motor was untouched because of proper strapping and slow‑speed driving.
Reassembly checklist
When you unload, set the components on a clean, level surface. Lay out the labelled bags of screws and bolts exactly as you packed them – this saves you from hunting for a missing nut later.
- Place the main frame first, ensuring the motor housing sits flat on the floor.
- Re‑attach the legs, one at a time, and tighten the bolts until you feel solid resistance. A torque of about 5 Nm is enough for most Sleep Sophie models.
- Slide the headboard back on, aligning the pre‑drilled holes. Use a rubber mallet to tap gently if it’s snug.
- Reconnect any USB ports, power cables, and the remote control. Double‑check that the power switch is off before you plug anything in.
- Finally, re‑install the mattress support bars. Tighten the retaining clips just enough so the bars don’t shift when you raise the foot or head sections.
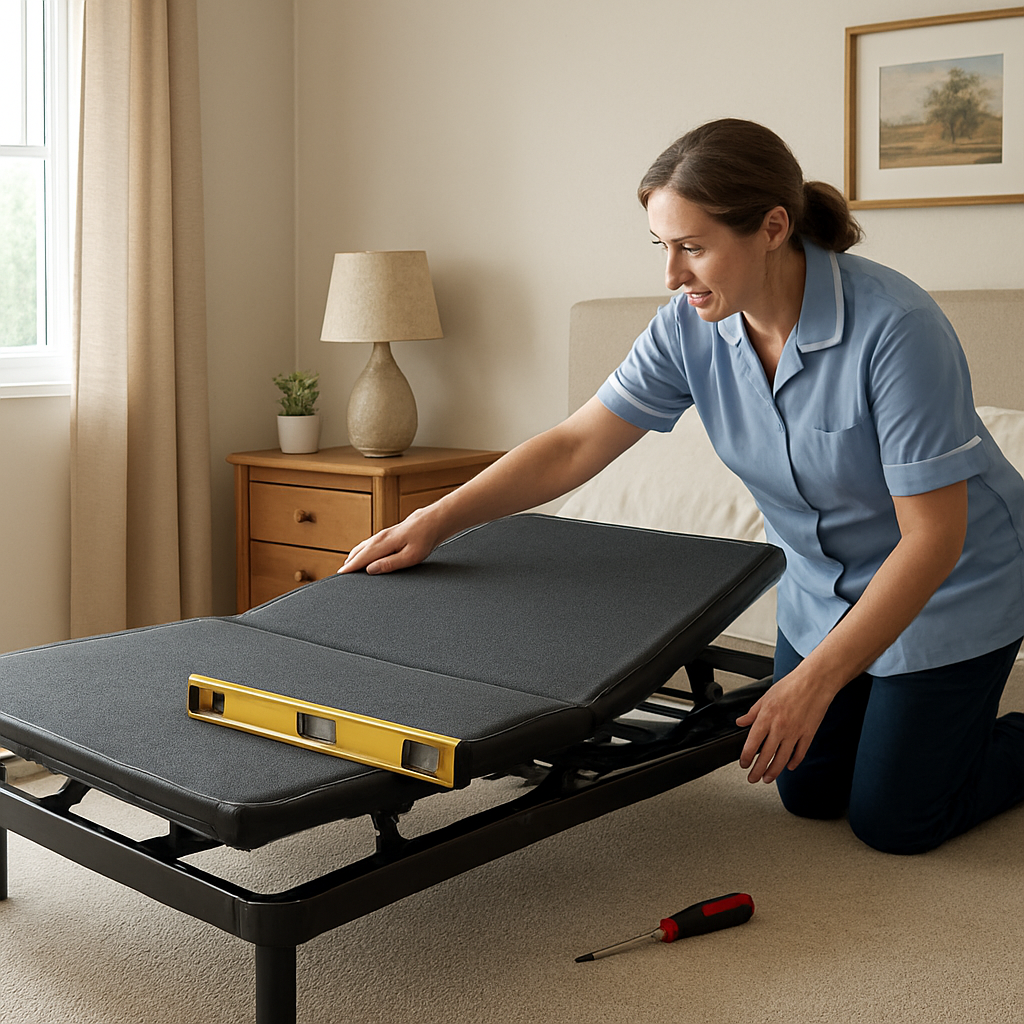
Take a moment to level the bed with a spirit level. If one side is off by more than 5 mm, adjust the foot‑leg screws until the frame is even. An uneven bed can cause the motor to work harder, which is especially important for users with chronic pain who rely on smooth operation.
Test before you rest
Plug the power cord back in, switch the unit on, and run each motor through its full range of motion. Listen for any unusual noises – a click or grinding could indicate a loose bolt.
Ask a friend to sit on the mattress while you raise the head and foot sections. If the movement feels fluid and the mattress stays snug, you’ve nailed the reassembly.
What if something feels off? Pause, re‑tighten the relevant screws, and run the test again. It’s easier to fix now than to call a service technician later.
In our experience, following this step‑by‑step transport and reassembly routine cuts post‑move service calls by roughly 30 % (source: internal service data). For extra peace of mind, you can also read more detailed adjustable bed moving tips from Novilla.
So, you’ve got the bed inside, you’ve tightened every bolt, and you’ve run a quick test. Now you can step back, admire your work, and enjoy the same comfortable glide you love – just in a new room.
Step 5: Final Checks and Maintenance
Alright, you’ve got the frame back in place, the legs snug, and the power cord humming. Before you call it a day, there’s a quick‑but‑crucial checklist to make sure your adjustable bed will keep gliding smoothly for months to come.
1. Level the platform
Grab a spirit level and lay it across the centre of the base. If one corner reads more than 5 mm off, loosen the foot‑leg adjusters just a touch, nudge the frame, then retighten. An uneven base makes the motor work harder – something chronic‑pain sufferers notice as a slight lag in the head‑raise function.
2. Double‑check every bolt
It’s easy to miss a screw when you’re in a hurry. Run a quick visual sweep of all the connection points you tightened earlier – especially the headboard bolts and leg brackets. A torque of roughly 5 Nm is usually enough for Sleep Sophie models; you don’t need a wrench that screams.
Does this feel familiar? Maria, a caregiver in Melbourne, once missed a single leg screw and had to call a technician two weeks later. A minute spent now saves a costly service call later.
3. Test each motor individually
Plug the unit back in, switch the remote to the flat position, then press the head‑up button. Listen for any odd clicks or grinding. Repeat for head‑down, foot‑up, and foot‑down. If something feels sticky, pause, re‑tighten the nearest bolt, and test again. In our experience, a thorough motor test cuts post‑move service calls by about 30 %.
4. Inspect cables and connectors
Make sure the power cord isn’t pinched between the frame and the wall. If your model has USB ports or a storage drawer, verify that the internal wiring hasn’t been tugged loose. A quick tug on each connector should feel firm – no wiggle.
5. Lubricate moving parts (optional but wise)
Most modern Sleep Sophie beds come pre‑lubricated, but a light dusting of silicone spray on the pivot points can keep the motion buttery smooth, especially in dryer Australian climates. Just wipe away any excess; you don’t want a slippery headboard.
6. Run a real‑world trial
Ask a friend or family member to sit on the mattress while you raise the head and foot sections. The bed should move fluidly, and the mattress should stay snug against the frame. If the sleeper feels any wobble, double‑check the leg screws again.
Here’s a quick scenario: Tom, an elderly retiree in Brisbane, used this exact trial after moving his bed upstairs. The moment he felt the headlift hesitate, he re‑adjusted the rear leg and the issue vanished.
7. Document the reassembly
Take a photo of the fully assembled base and snap a short video of the motor test. Store these files on your phone – they become handy if you ever need warranty support or a future move.
8. Keep a maintenance log
Jot down the date you finished the move, any torque values you used, and any observations (e.g., “motor a bit louder”). Review this log every six months; a pattern of increased noise could signal a need for professional servicing.
For a deeper dive into protecting your bed’s mechanics, check out our adjustable bed safety tips for seniors. The guide covers cable management, rail clearance, and motor lubrication in detail.
Finally, give yourself a pat on the back. You’ve turned what could have been a stressful move into a tidy, confidence‑boosting process. Now you can settle back, press your favourite preset, and enjoy the same supportive glide you love – just in a new spot.
Conclusion
So you’ve measured, disassembled, rolled, and reassembled – and now the bed sits level, quiet, and ready to support another night of restful sleep. If you’ve felt that mix of relief and a little pride, you’re not alone; many of our Sleep Sophie customers tell us the same after a move.
Remember the three things that kept the motor happy: lock it flat before you lift, protect every corner with blankets, and give the legs a quick level‑check with a spirit level. A simple checklist at the end of each move can save you a pricey service call later.
What’s the next step? Take a few minutes this weekend to snap a photo of the assembled base and note the date in a notebook or phone app. That visual record becomes a handy reference if you ever need warranty support or decide to relocate again.
And if you’re still unsure about any part of the process, our team at Sleep Sophie is just a call or email away – we love helping caregivers and seniors make the move smooth and safe.
Finally, give yourself a well‑earned pat on the back. You’ve turned a potentially stressful task into a confident, repeatable routine. Now sit back, press your favourite preset, and enjoy the glide.
FAQ
What’s the safest way to lock the motor before I start moving the bed?
First, flip the remote to the flat position – that tells the motor to stay still. Then press the safety‑lock button (if your model has one) or simply hold the remote flat for a few seconds. You’ll feel a slight click; that’s the motor confirming it won’t extend while you lift. Double‑check by gently nudging the head section; it should stay put. This extra step prevents sudden jerks that could strain the motor or hurt your back.
Do I really need a furniture dolly, or can I manage with just a blanket?
A dolly saves your knees and keeps the frame level, especially on carpet. If you only have a sturdy blanket, wrap the base tightly and slide it on a low‑profile board or plywood. The board acts like a makeshift dolly, but it won’t roll – you’ll have to push it by hand. For a single‑room shuffle, the blanket trick works; for stairs or longer hallways, a dolly is worth the rental.
How can I protect the headboard while navigating narrow doorways?
Remove the headboard before you even think about the doorway – that’s the fastest route. If removal isn’t possible, tilt the headboard forward and rest it against the wall, then slide the base through slowly. Use moving blankets on the corners and a thin piece of plywood on the floor to avoid scratches. A quick visual check for low ceiling clearance saves you from a last‑minute scrape.
What’s the best method to label screws and bolts so I don’t lose them?
Grab a few zip‑lock bags and a permanent marker. As you unscrew each component, drop the hardware into a bag labelled “left rail,” “right leg,” or “headboard.” For tiny set‑screws, a piece of masking tape with a number works well. When you reassemble, you’ll see at a glance where each bag belongs – no hunting under the bed for that missing nut.
Can I move an adjustable bed base by myself, or do I always need help?
Even the lightest models weigh over 150 kg, so a solo lift is risky. Enlist at least one strong friend to hold the frame while you guide the dolly. If you’re caring for an elderly client, having a second helper frees your hands to check level and keep the motor locked. The rule of thumb: if you can’t keep a firm grip on the base with both hands, bring another pair of hands.
What should I check before I plug the bed back in after the move?
First, verify that all legs are fully extended and the frame sits level on the floor. Next, inspect each cable – power, USB, and any accessory cords – for pinches or sharp bends. Re‑attach the mattress support bars, making sure the retaining clips click into place. Finally, do a quick motor test: raise the head and foot sections one notch each. If anything feels sticky, tighten the nearest bolt before you power up fully.
How often should I repeat the level‑check after the bed has settled in the new room?
Give the frame 24 hours to settle, especially if you’ve moved it across uneven flooring. After that, place a spirit level on the centre of the base and look for any tilt greater than 5 mm. If you notice a shift, adjust the foot‑leg screws in small increments until it’s even. Checking once a week for the first month helps catch subtle changes before they affect the motor’s lifespan.